The Martus EZ Connector is used with File-Based Integrations to help to automate the process of loading transaction files into Martus.
The EZ Connector is a Martus application that is installed in a location of the customer’s choice on the customer's network; this is the location where transaction files from the customer’s accounting system will be placed. The customer’s IT team will be responsible for setting up the Martus EZ connector, following the instructions below.
The Martus EZ Connector is a Windows Service that periodically polls a configured folder for new files. If any are found, they are automatically uploaded to Martus over HTTPS. Please note, the EZ Connector is not a server which listens for incoming connections. It does not hold an open connection to Martus.
Before reading this document, you should be familiar with File-Based Integrations. Refer to File-Based Integrations - User Documentation for more information.
Martus Instance Configuration
The Martus implementation consultant will provision the Martus instance. This will include adding Admin users to Martus. It’s typically best to have the person who will be installing the Martus EZ Connector (likely an IT staffer) temporarily set as an Admin so they can download the files needed on their computer. Once installed, those Admin privileges can be revoked.
Generating an API Token for the Automation Built into Martus
An Admin user (typically one on the finance team) will need to log into Martus, and generate the API token that grants access to Martus so that files can be uploaded via automation:
- Admin log into Martus
- Dashboard > Updater
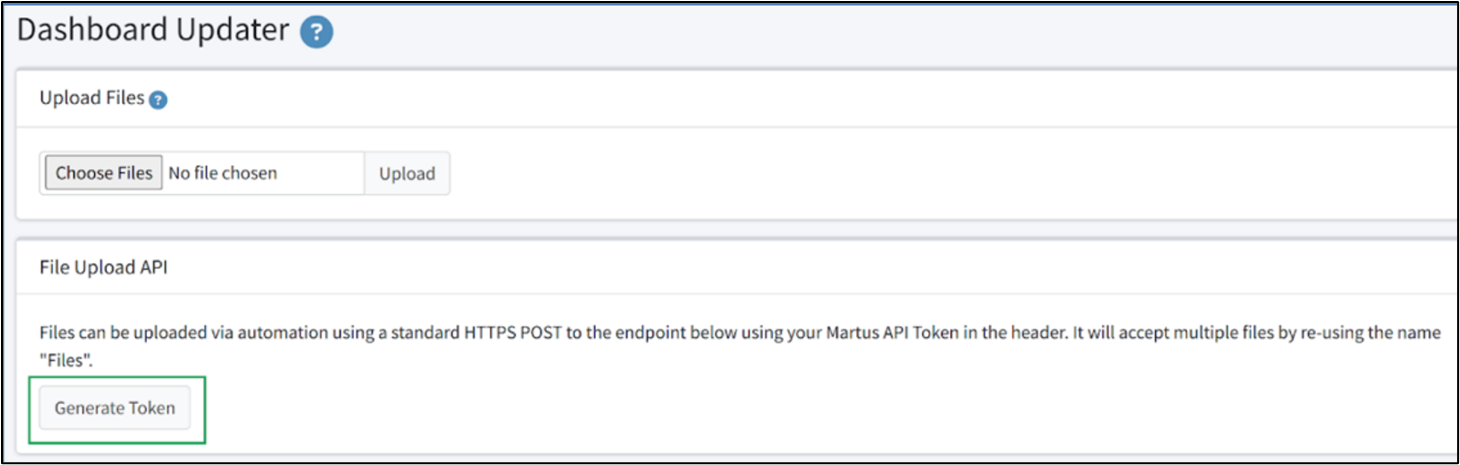
- Under File Upload API > Click Generate Token
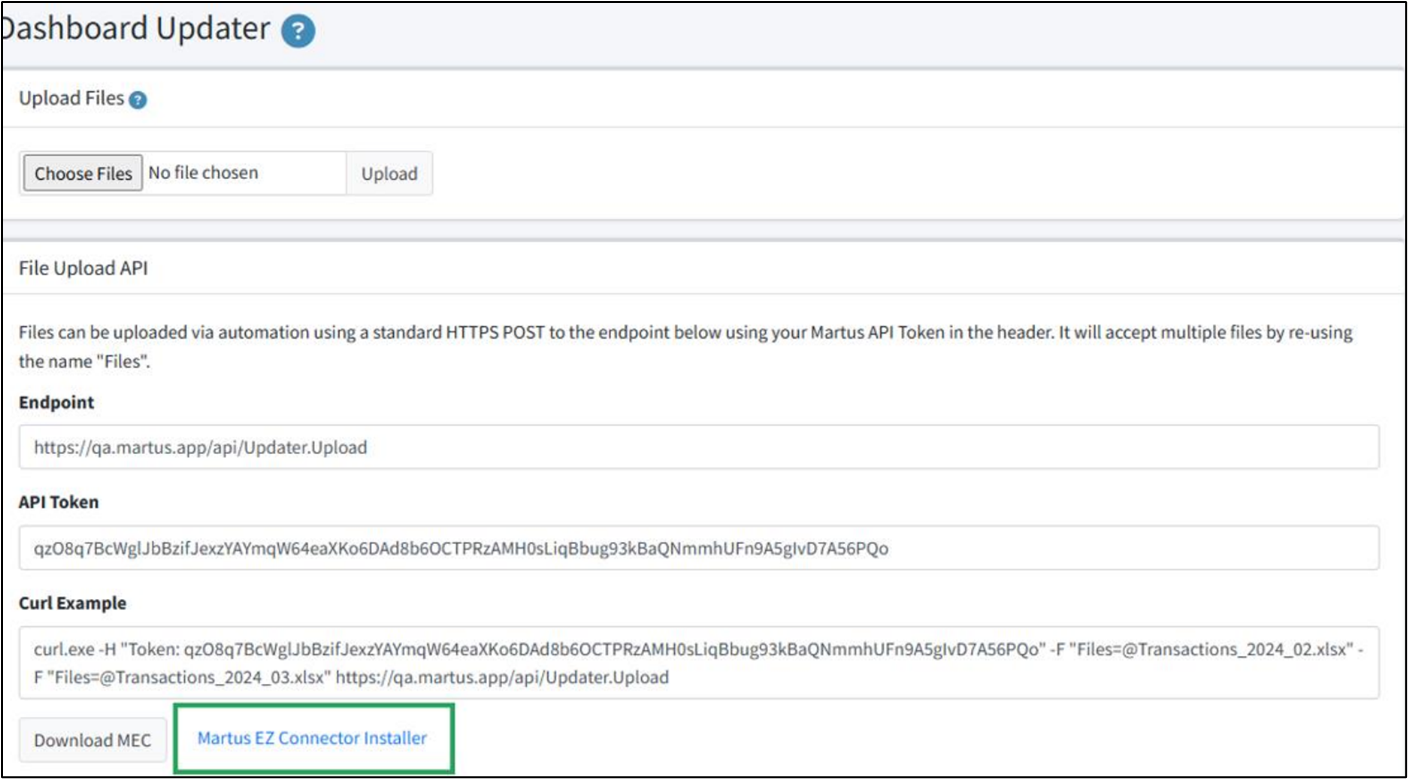
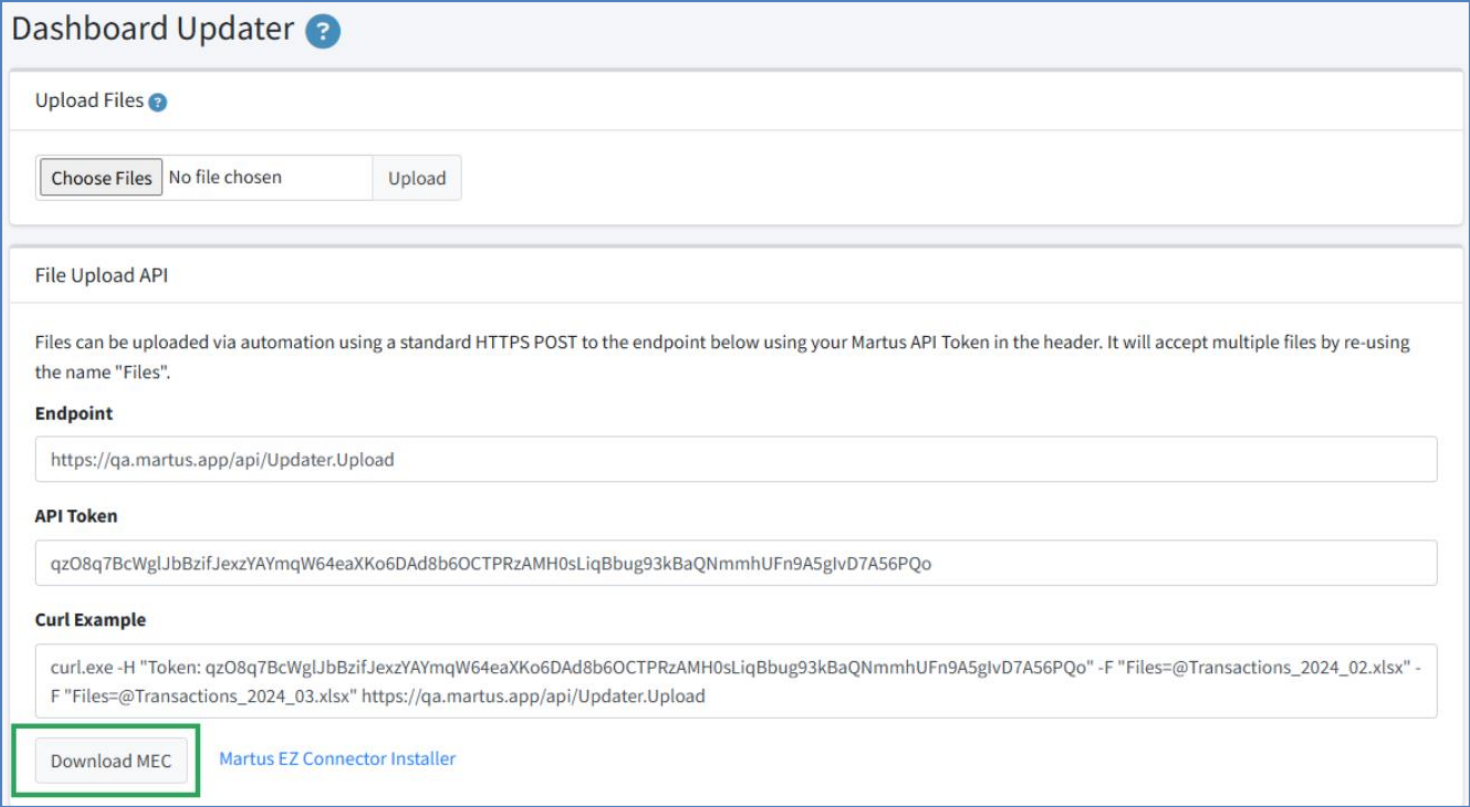
Once that Token is generated, the Endpoint, API Token, and Curl Example will populate for the Admin user to supply to their IT department in order to script the automation. (shown below)
Download and Install EZ Connector
We recommend that the IT person who will be installing the Martus EZ Connector (IT) be added as a user in Martus and temporarily set as an Admin so they can download the files needed in the appropriate location and access the files needed.
- IT Admin user logs ino Martus
- Dashboard > Updater
- Click Martus EZ Connector Installer
- Once the file downloads, click the file once to install EZ Connector
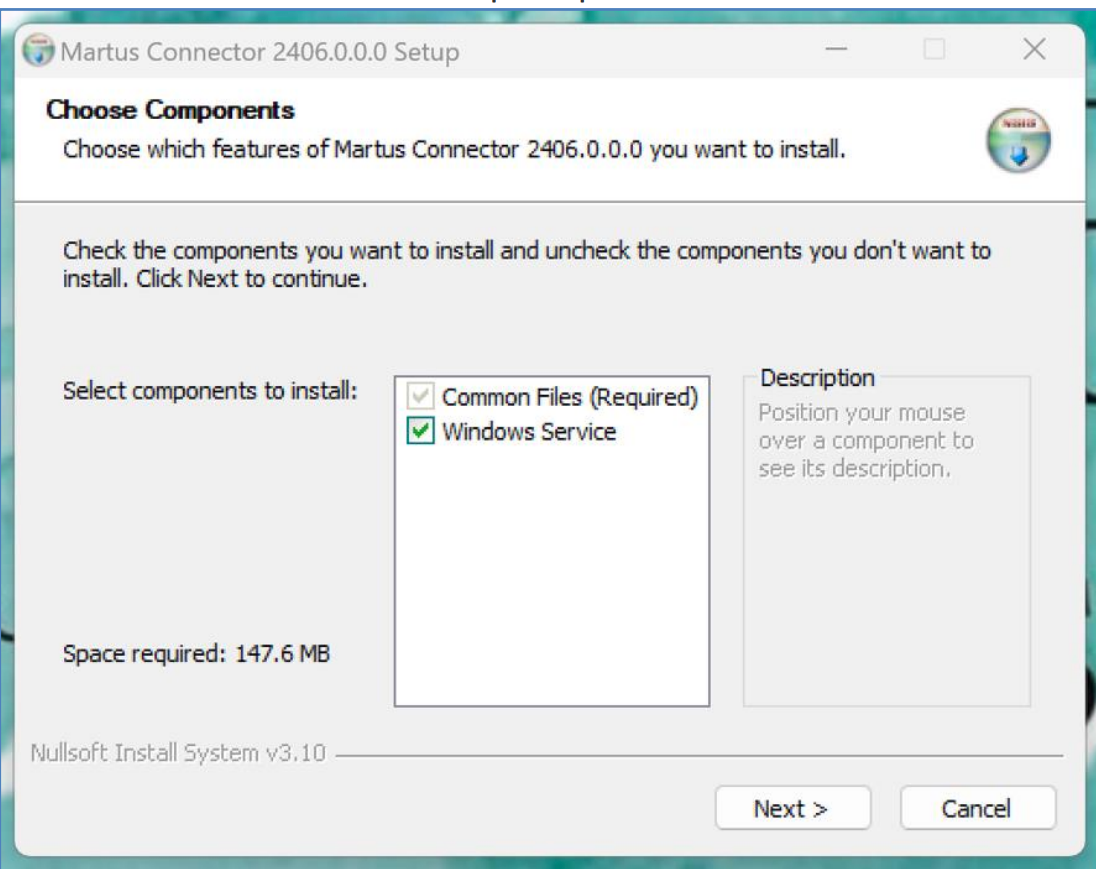
- Select Windows Service when prompted
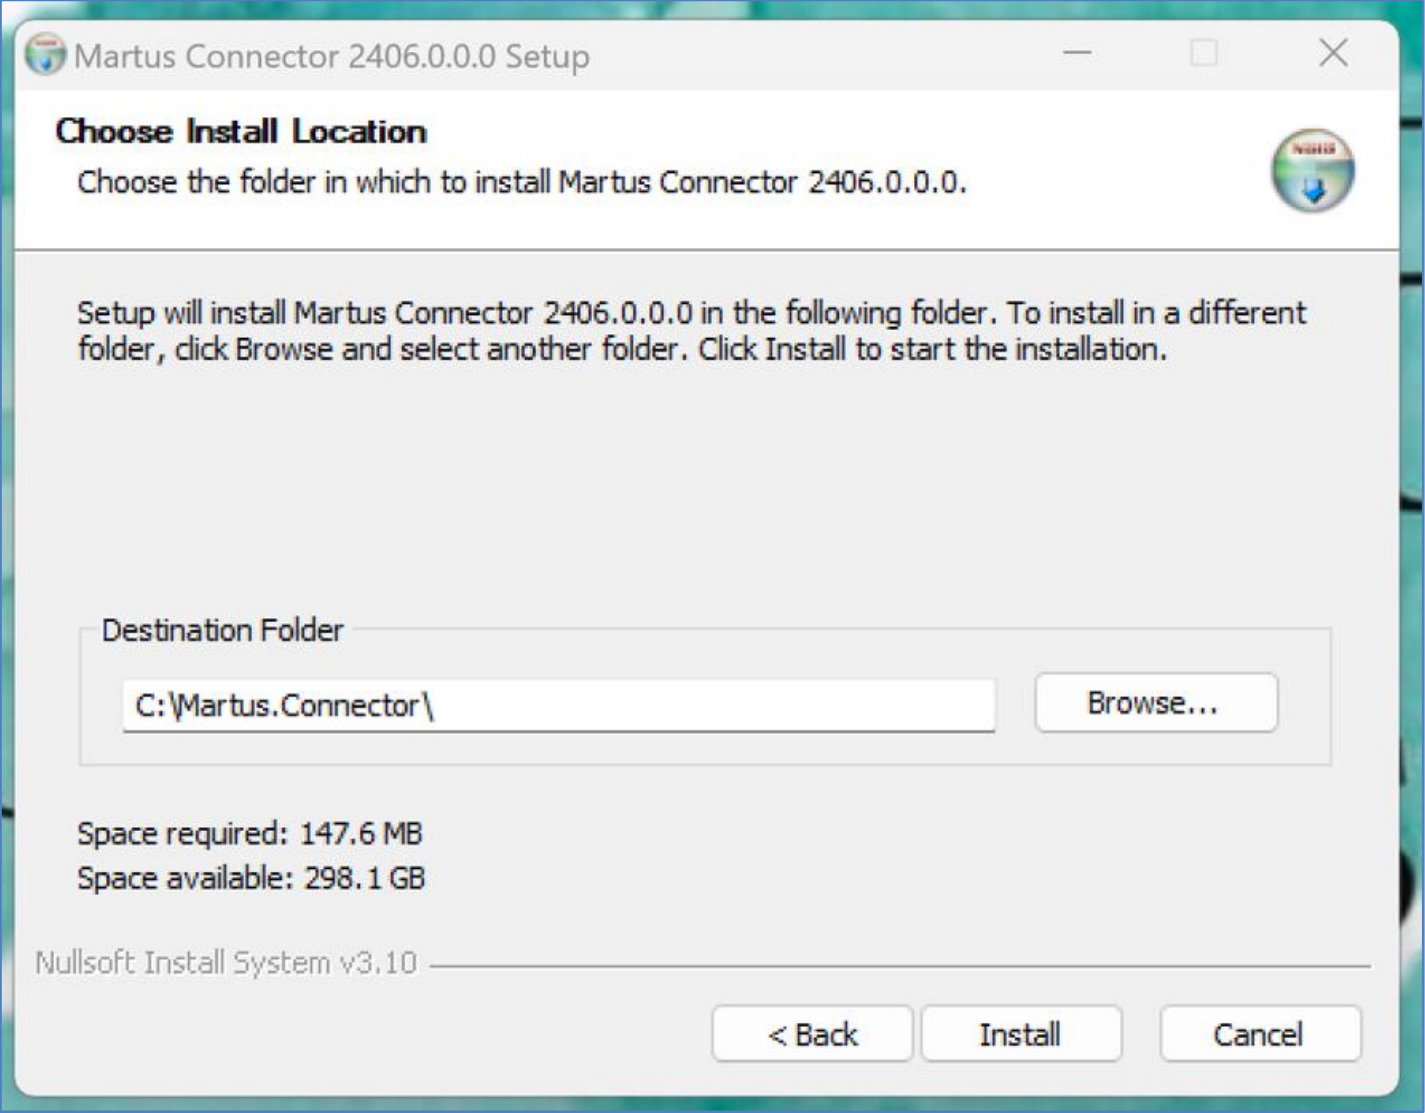
- Save in the desired location where transaction files from your accounting system can easily be placed
- In Martus, download MEC File
- Save a transaction file in the same location where the Martus.Connector file was created
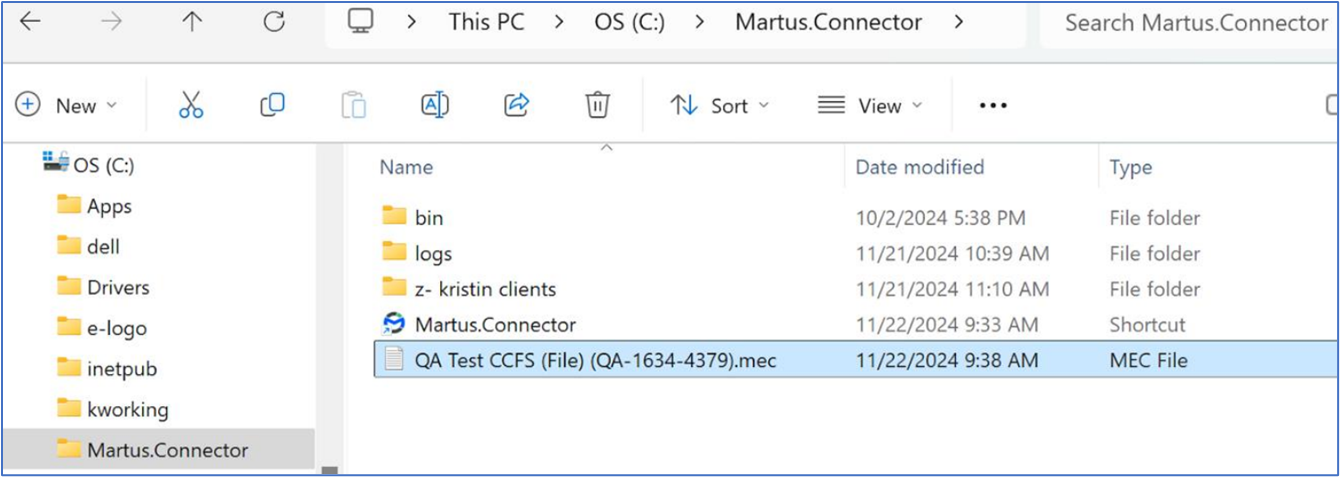
Launch Martus EZ Connector – Add Connection String to Make Connection
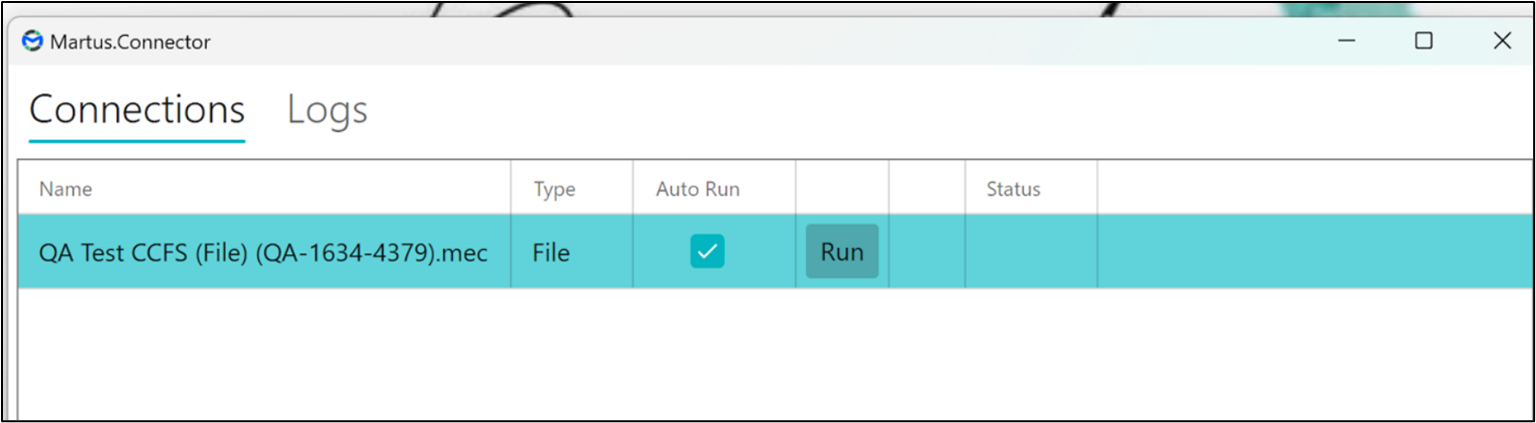
The company will now appear on the Martus Connector, but you will need to add the Connection String to make the connection.
- Open the Martus EZ Connector
- Click checkbox under Auto Run
Confirm New Folders Have Been Created
Once EZ Connector recognizes the connection, new folders will be automatically created to be used in the automation.
- In the Martus.Connector folder confirm new folder has been created (environment - client number). In this example the Environment is QA and the Client is 1634.
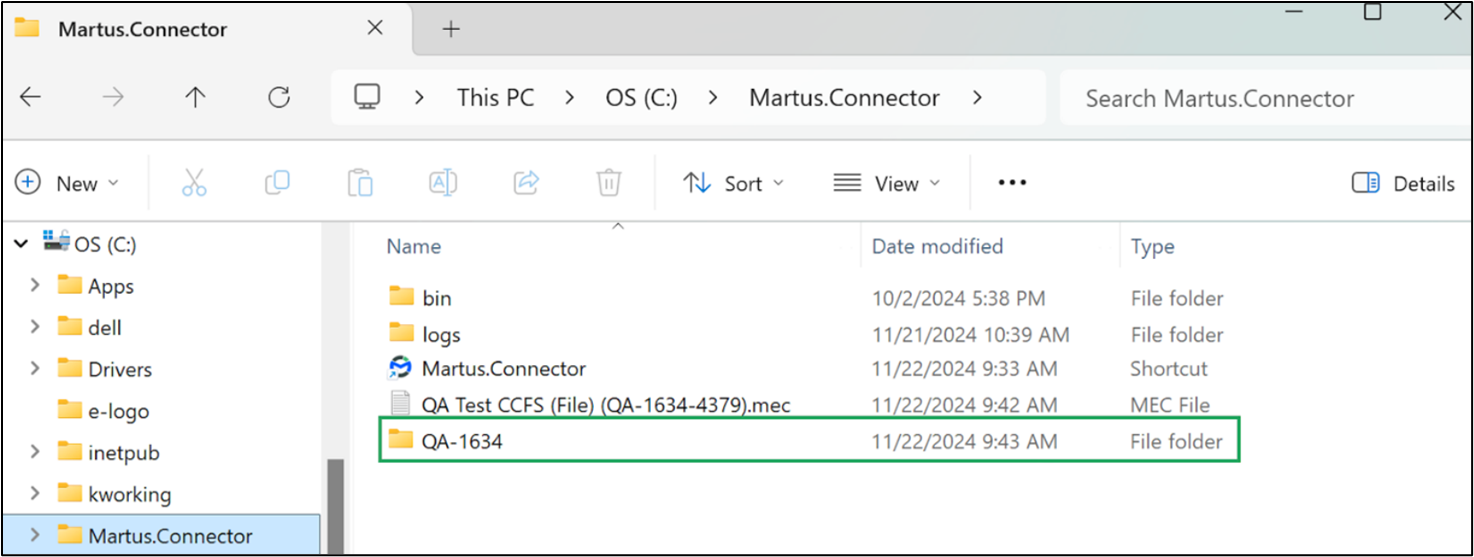
- Open folder and confirm appropriate subfolders have been created
- Archive
- Incoming
- Invalid
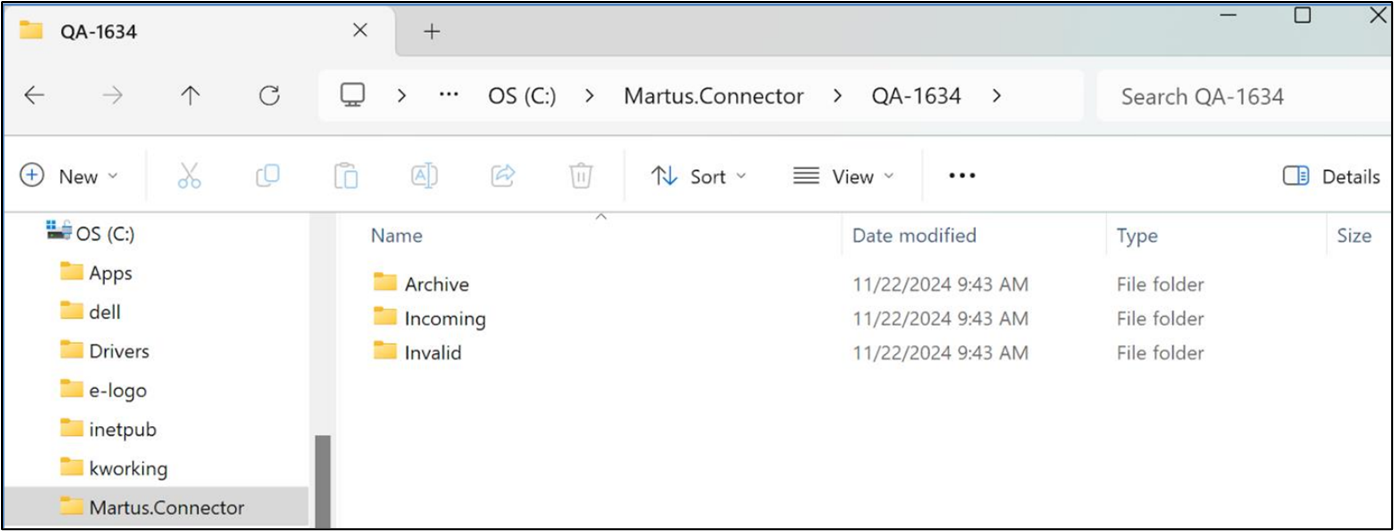
- Files can now be placed in this folder and automation can begin!
Test Connection
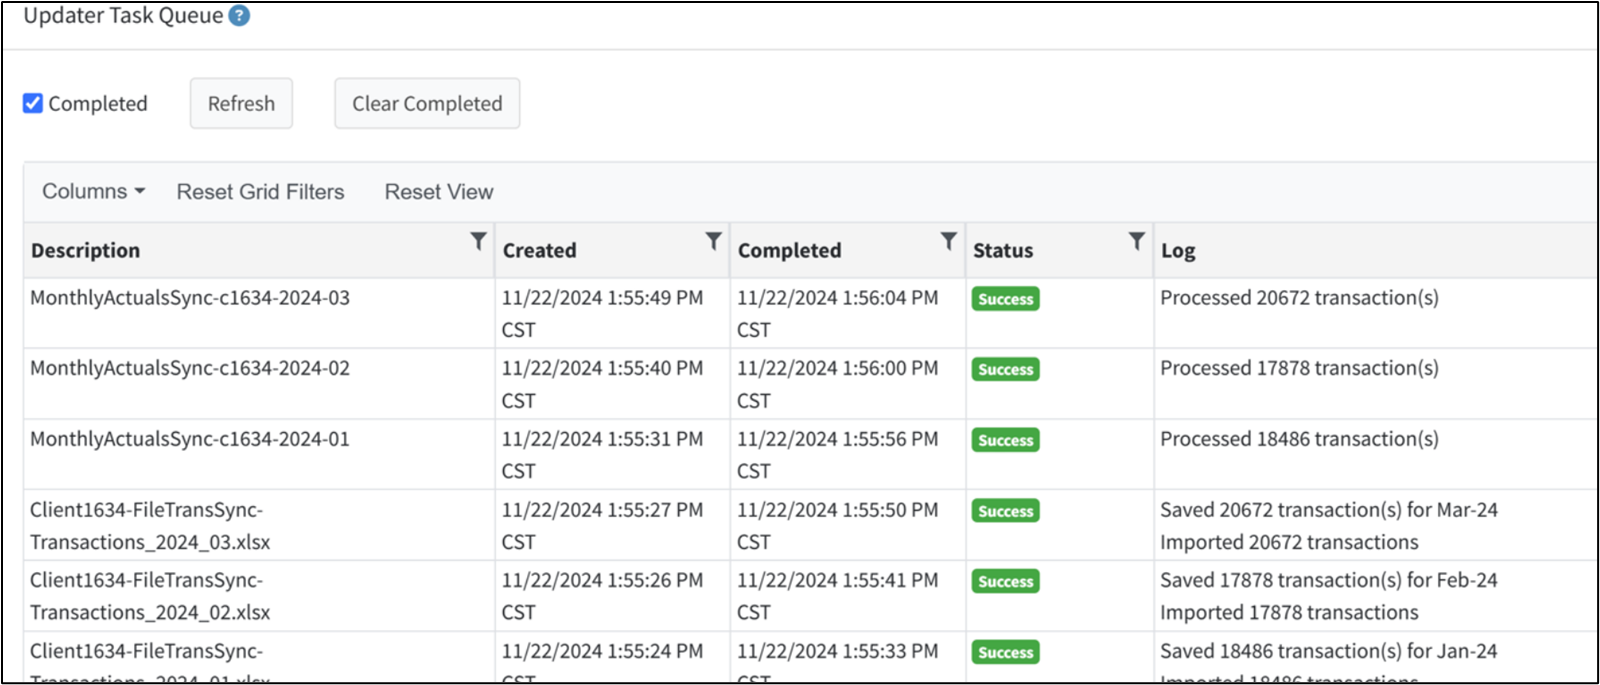
Test the automation. Upload a file into Incoming and watch what happens in Martus!
- Place file(s) in the Incoming folder
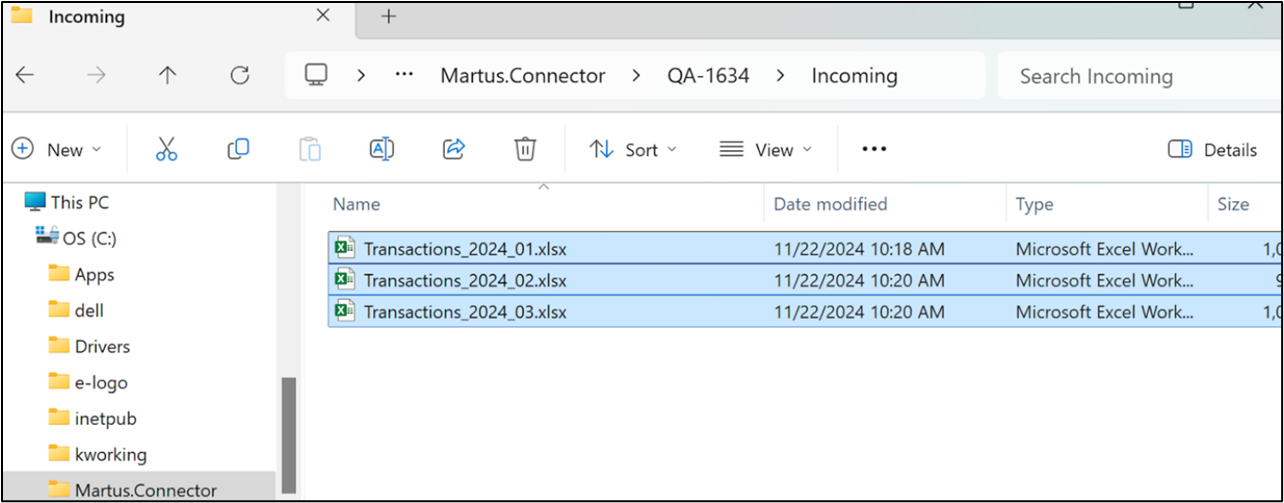
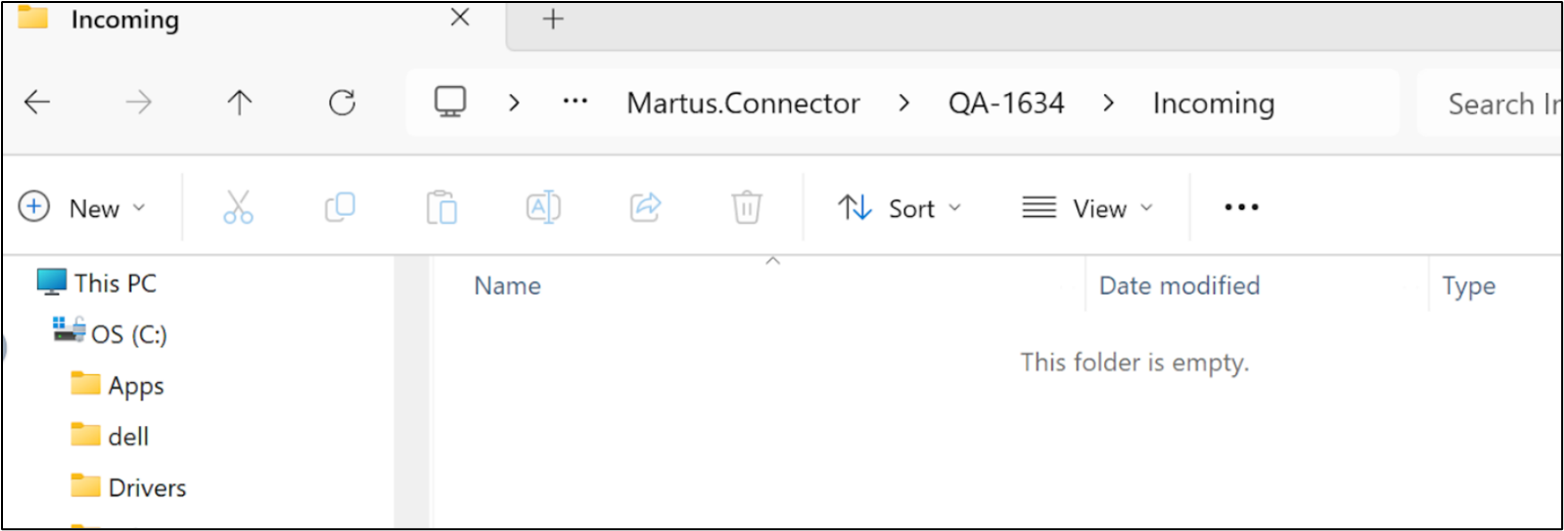
- To test automation - wait 60 seconds. Files will disappear from the Incoming folder and will appear in the Archived folder.
- Review Martus Updater Screen (Success!)
Was this article helpful?
That’s Great!
Thank you for your feedback
Sorry! We couldn't be helpful
Thank you for your feedback
Feedback sent
We appreciate your effort and will try to fix the article