The Personnel Requests feature is part of the Standard Plus, Plus and Premium Subscription levels. If you are interested in this feature, create a ticket through the Knowledge Base if you are a direct Martus customer, or contact your Martus reseller if you are supported through one of our Martus partners.
Personnel Requests allow Martus Admins to predesignate specific positions that can then be requested by non-admin users. These requests can be approved or rejected by a designated Personnel Request Approver. When approved, the requested positions will be added to the default Personnel Budgeting scenario.
Setup and Configuration
The following must be set up in order for non-admin users to submit Personnel Requests. These values can only be set by an Admin user or a non-admin user with the Config Personnel Budgeting permission. See below for steps to accomplish each requirement.
- Set the default personnel budgeting year
- Set the default personnel budgeting scenario
- Set a user as the Personnel Request Approver
- Create the Position Template Scenario
- Add positions to the Template Scenario
- Give Users Access to Make Personnel Requests
1. Set the Default Personnel Budgeting Year
The default personnel budget year specifies the year the requests are for.
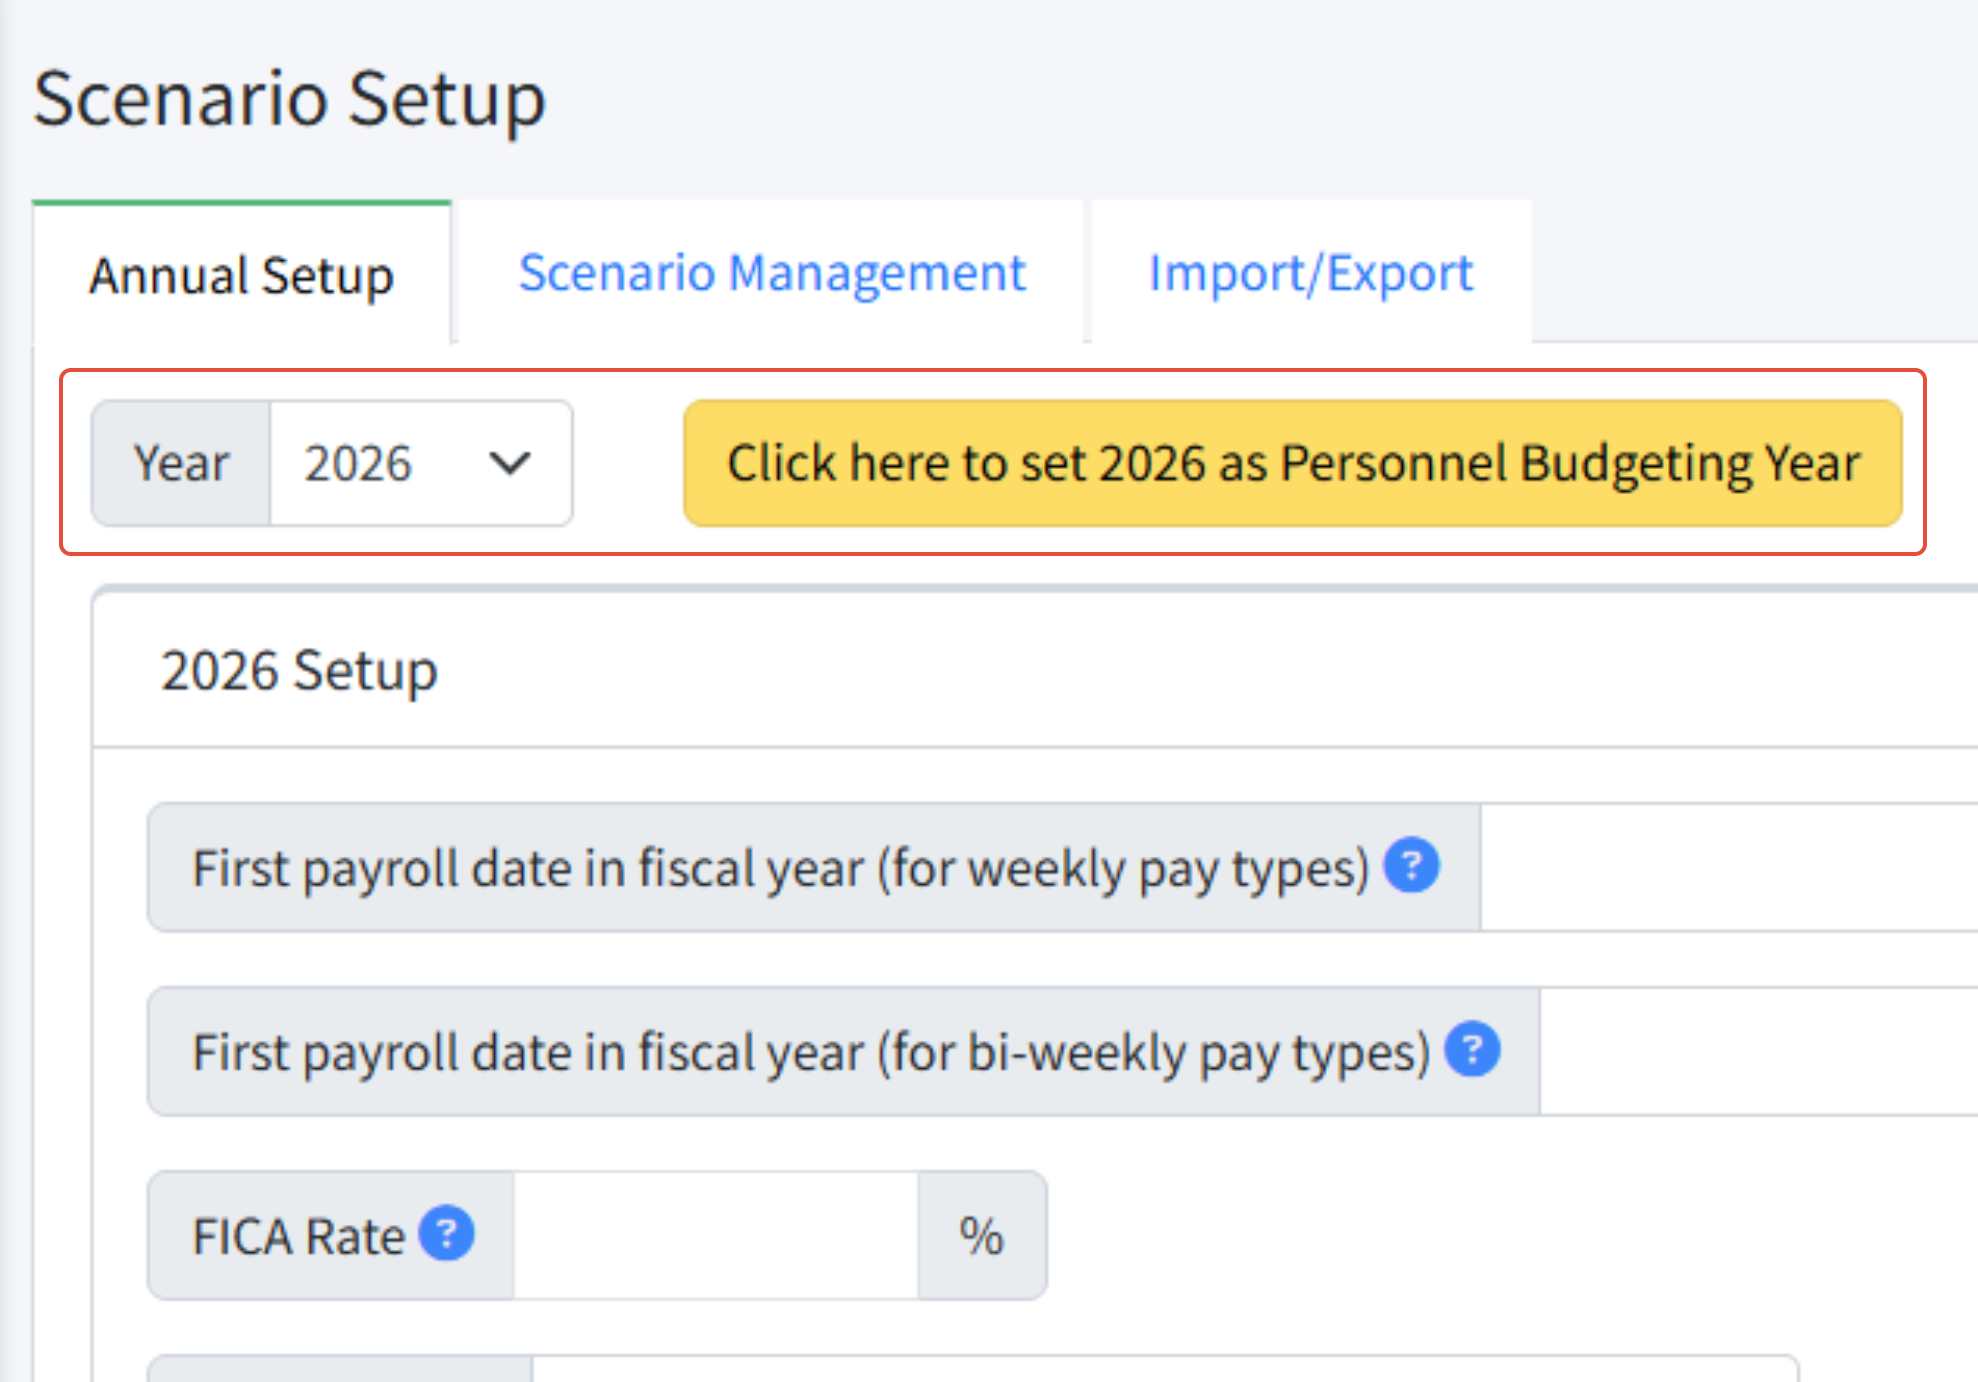
- Navigate to Personnel Budgeting > Scenario Setup > Annual Setup.
- Set Year to the appropriate year.
- Click Click here to set [Year] as Personnel Budgeting Year.
- Click OK when prompted.
2. Set the Default Personnel Budgeting Scenario
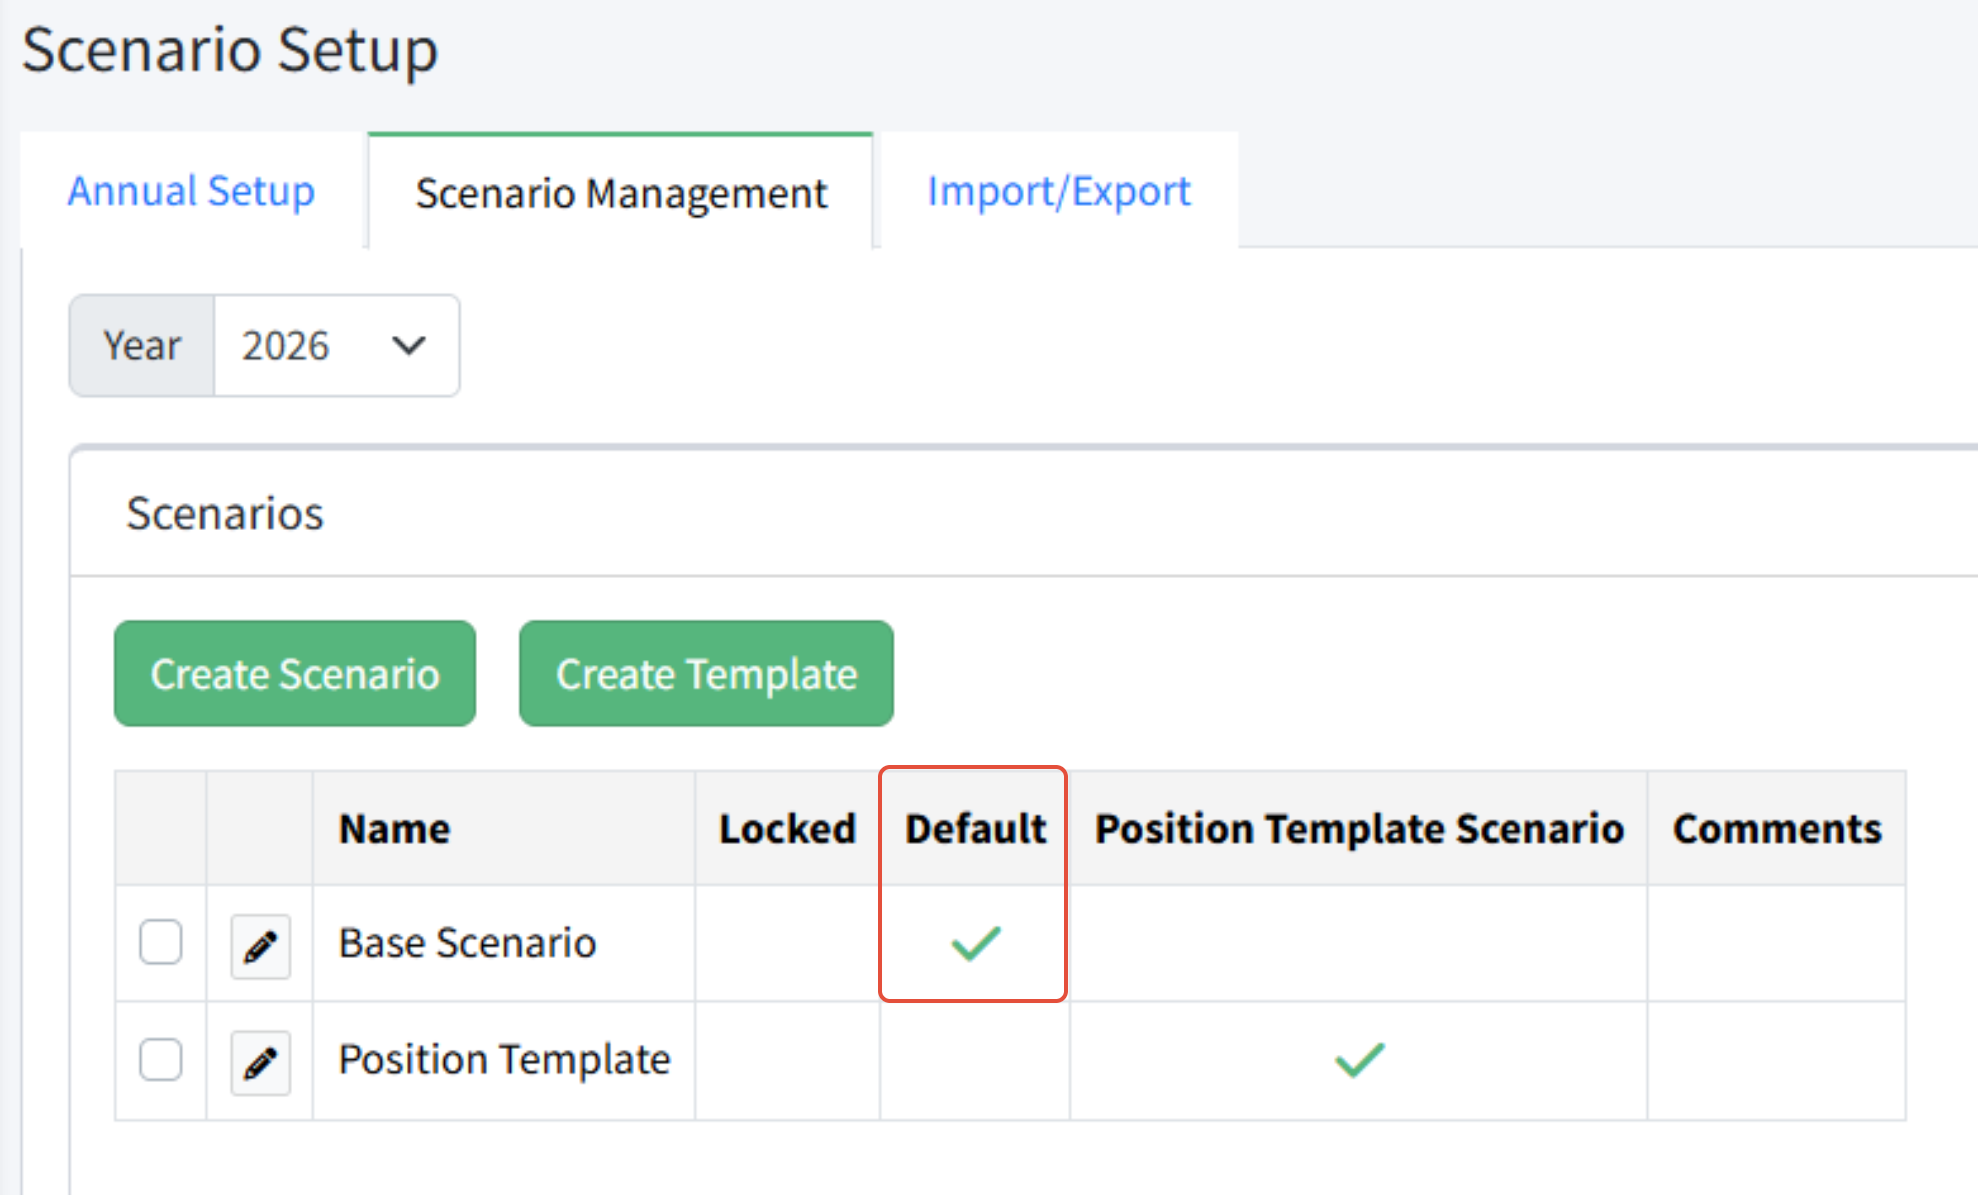
Only the default scenario is visible to non-admin users, so requests will be added to this scenario.
- Go to Personnel Budgeting > Scenario Setup > Scenarios Management.
- Click the box to the left of the scenario to use and click Set as Default.
3. Set a User as the Personnel Request Approver
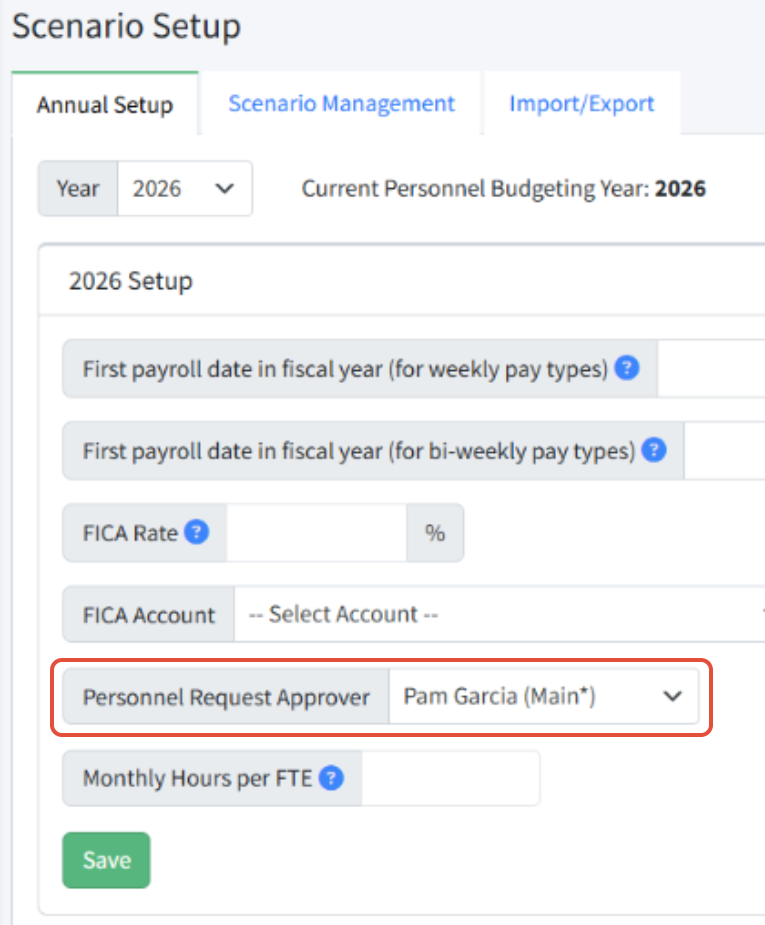
- Go to Personnel Budgeting > Scenarios Setup.
- Navigate to Annual Setup.
- Click the dropdown for Personnel Request Approver and set appropriate user.
- Click Save.
Notes about approvers:
- The Personnel Request Approver can be an Admin or non-admin user.
- This user may but does not have to have any other access to personnel budgeting information.
- The user assigned as the approver can approve or reject any personnel requests, regardless of any dimensional restrictions for that user.
- This user can only approve personnel requests for the year(s) to which they are assigned.
- If the user assigned as the Personnel Request Approver does not have access to Personnel, Martus will automatically update their user record and grant them access.
4. Create the Position Template Scenario
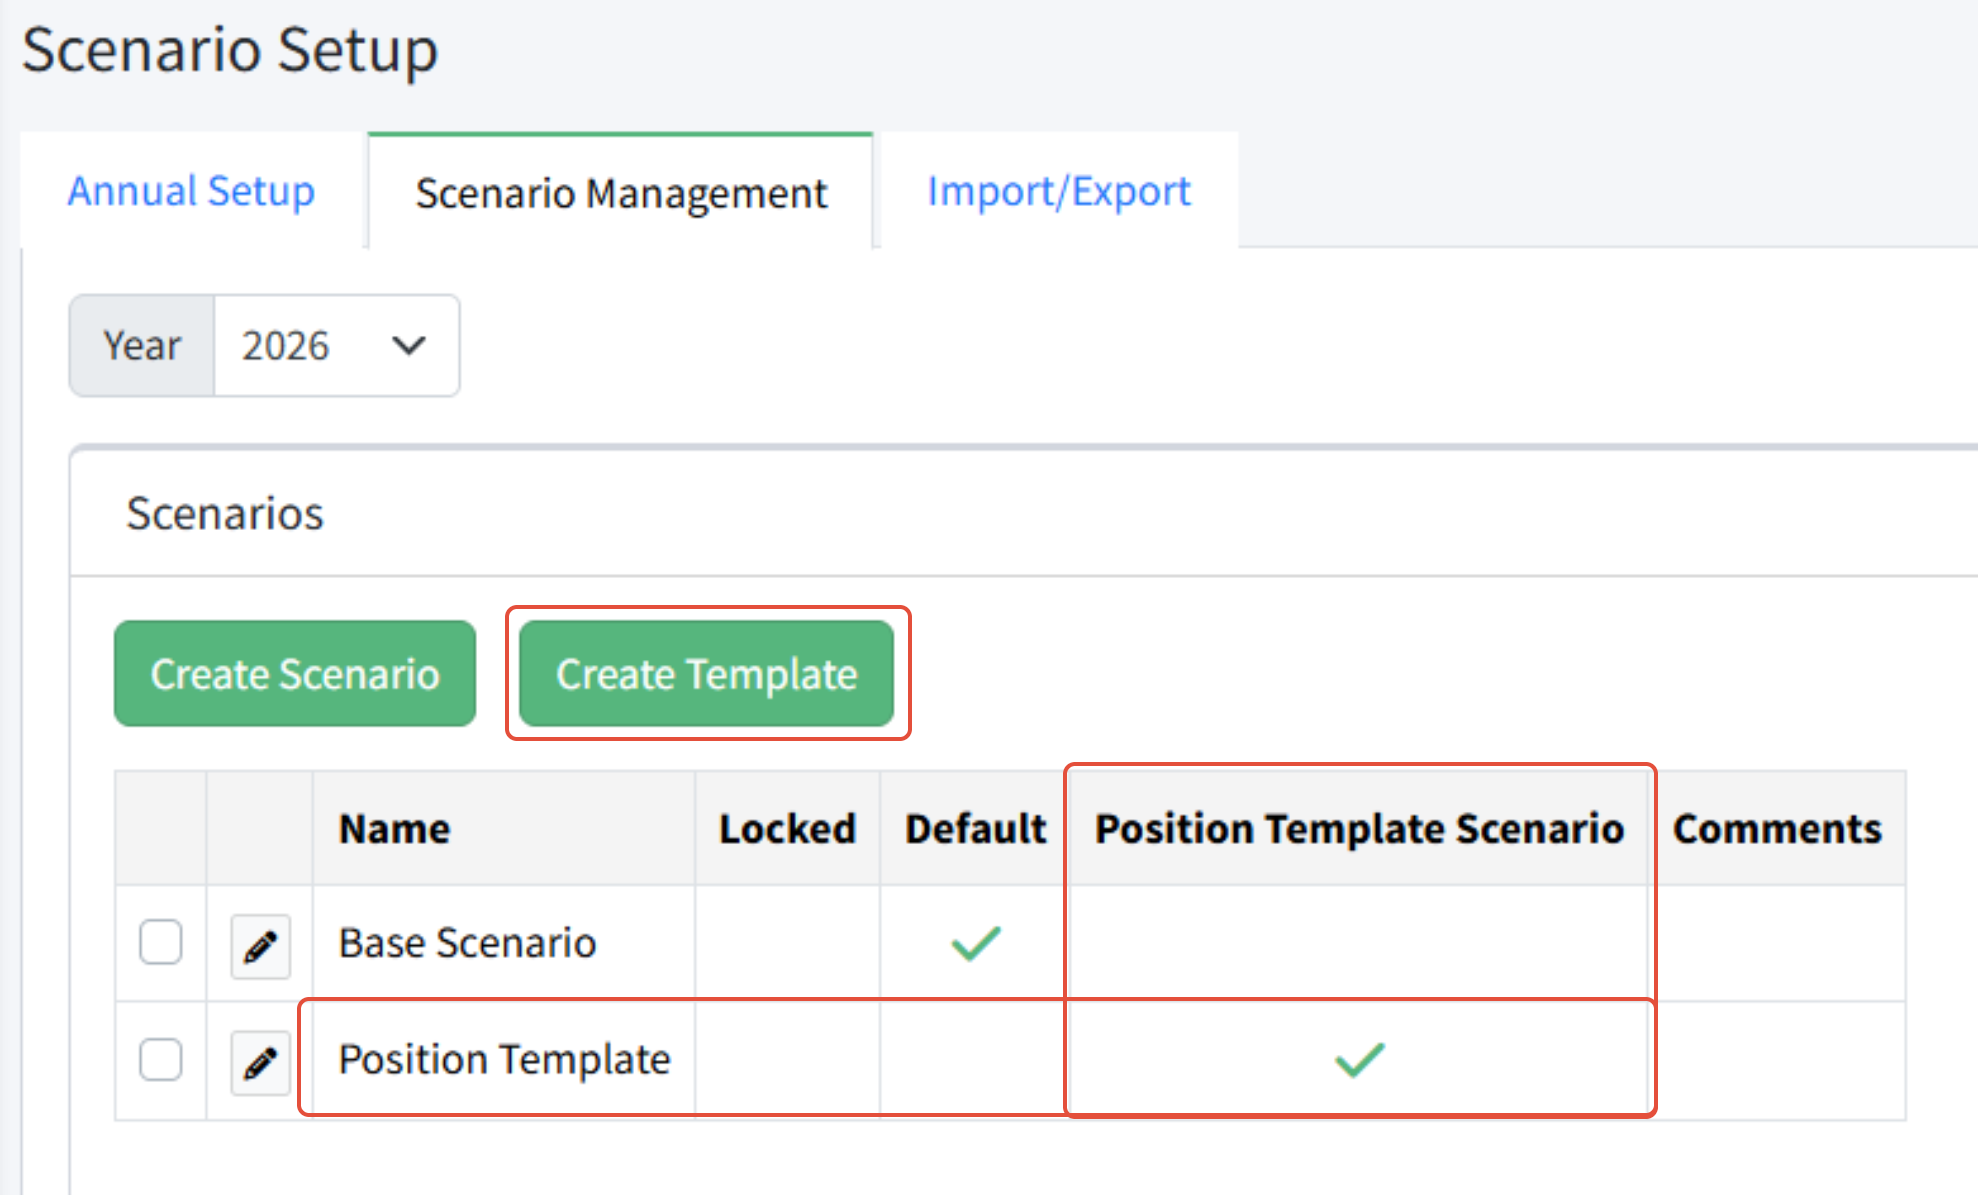
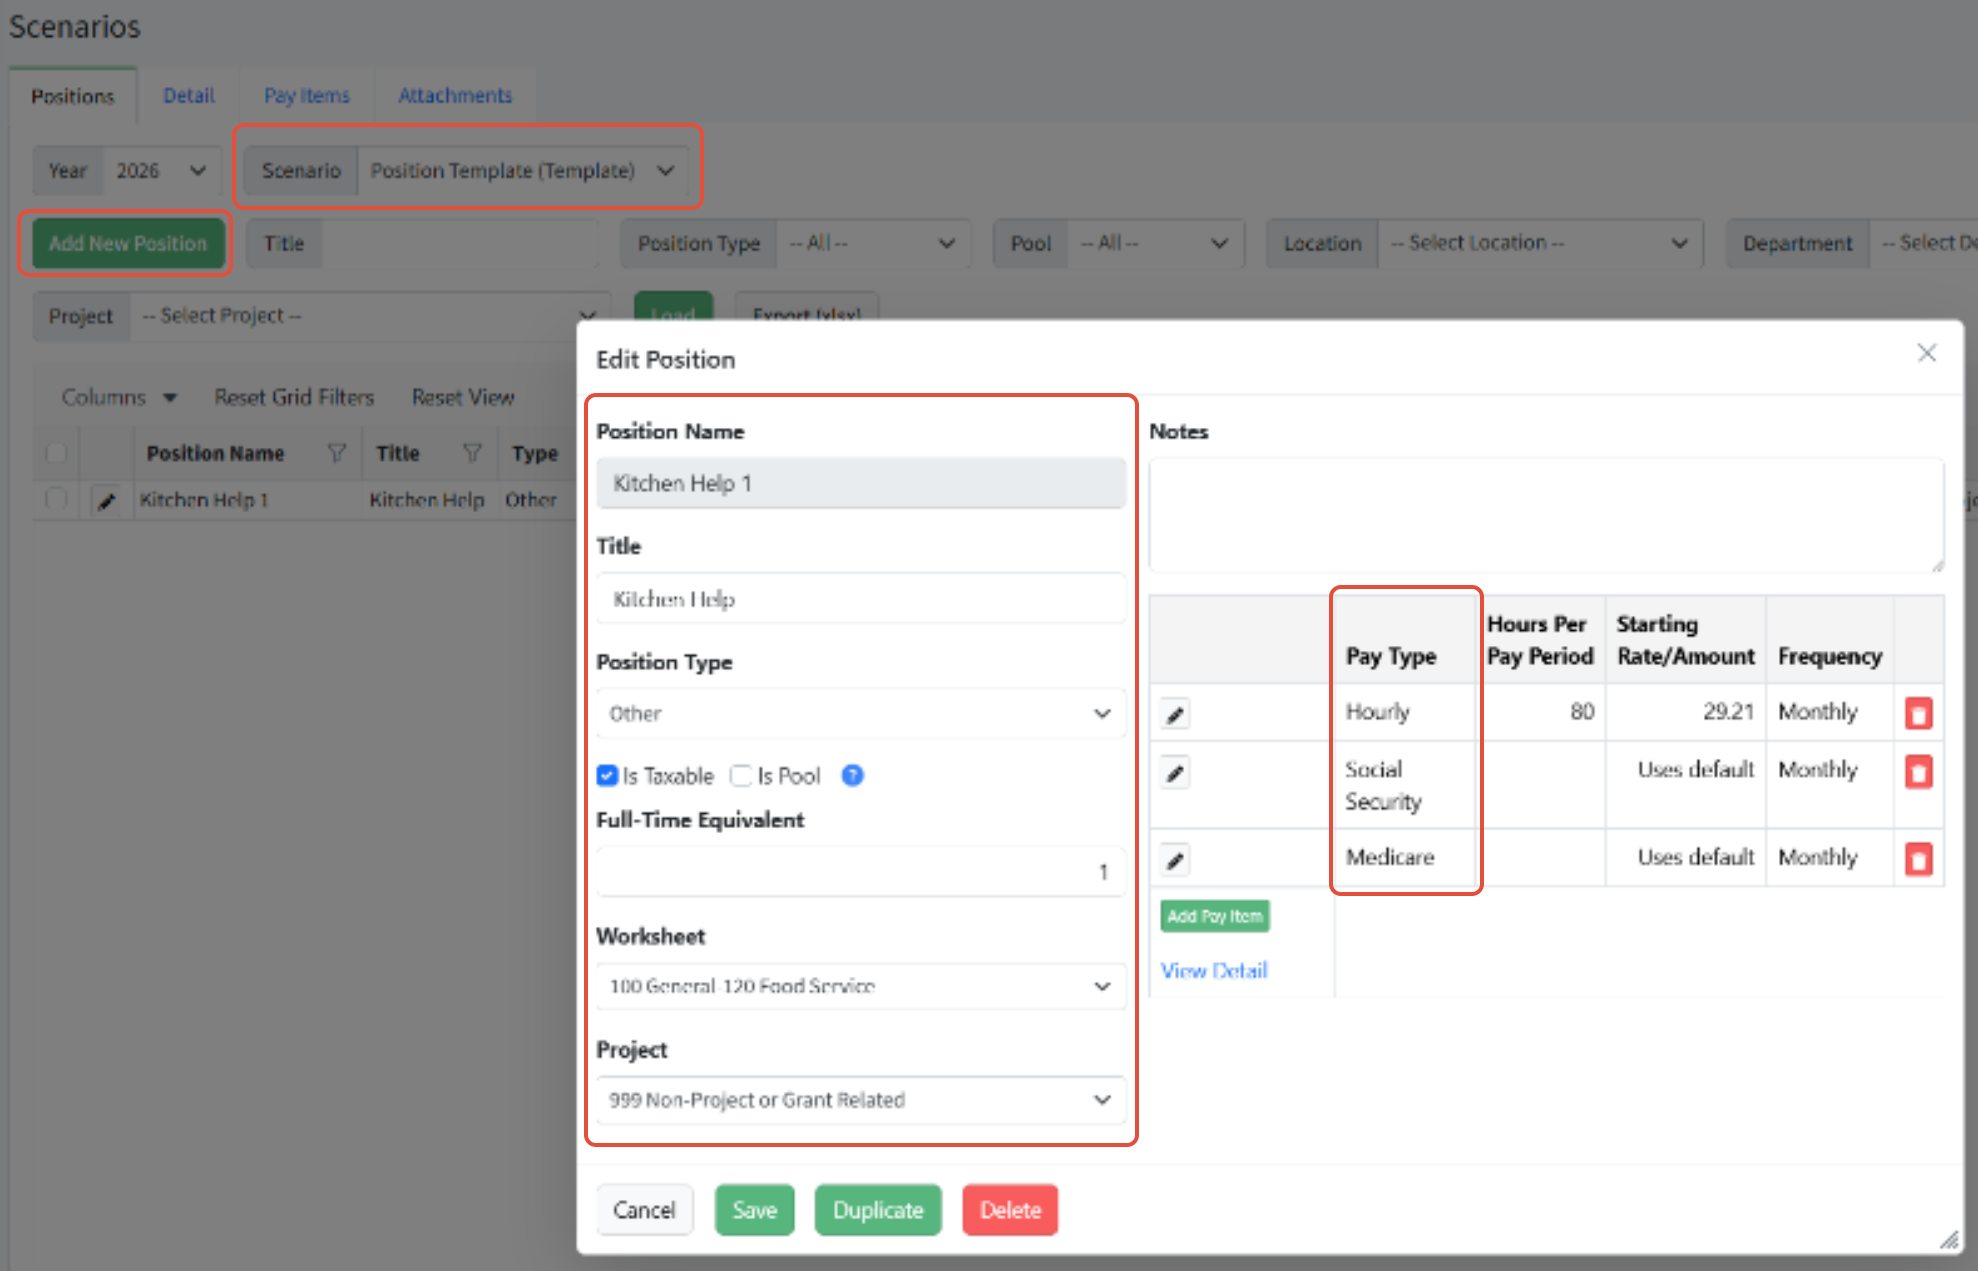
The Position Template Scenario needed for Personnel Requests in Personnel Budgeting defines all the positions for which personnel requests can be made. These are called position templates. Each position template must be assigned a title, a position type, dimensions for an existing budget worksheet, and the default pay items for that position.
Create Position Templates:
- Go to Personnel Budgeting > Scenario Setup.
- Click Create Template.
- Type in a name.
- Click Add.
5. Add Positions to the Template Scenario
- Go to Scenarios > Positions and select the Year and Position Template created in step #4 above.
- Add positions as appropriate.
- Each position template is defined by the Position Type and dimensions.
- Click Save.
- Add applicable pay items for this position.
Notes about Positions:
- Each position must be a unique combination of position type and dimensions.
- Requestable positions can be added by an Admin user or a non-admin user with the Config Personnel Budgeting permission.
6. Give Users Access to Make Personnel Requests
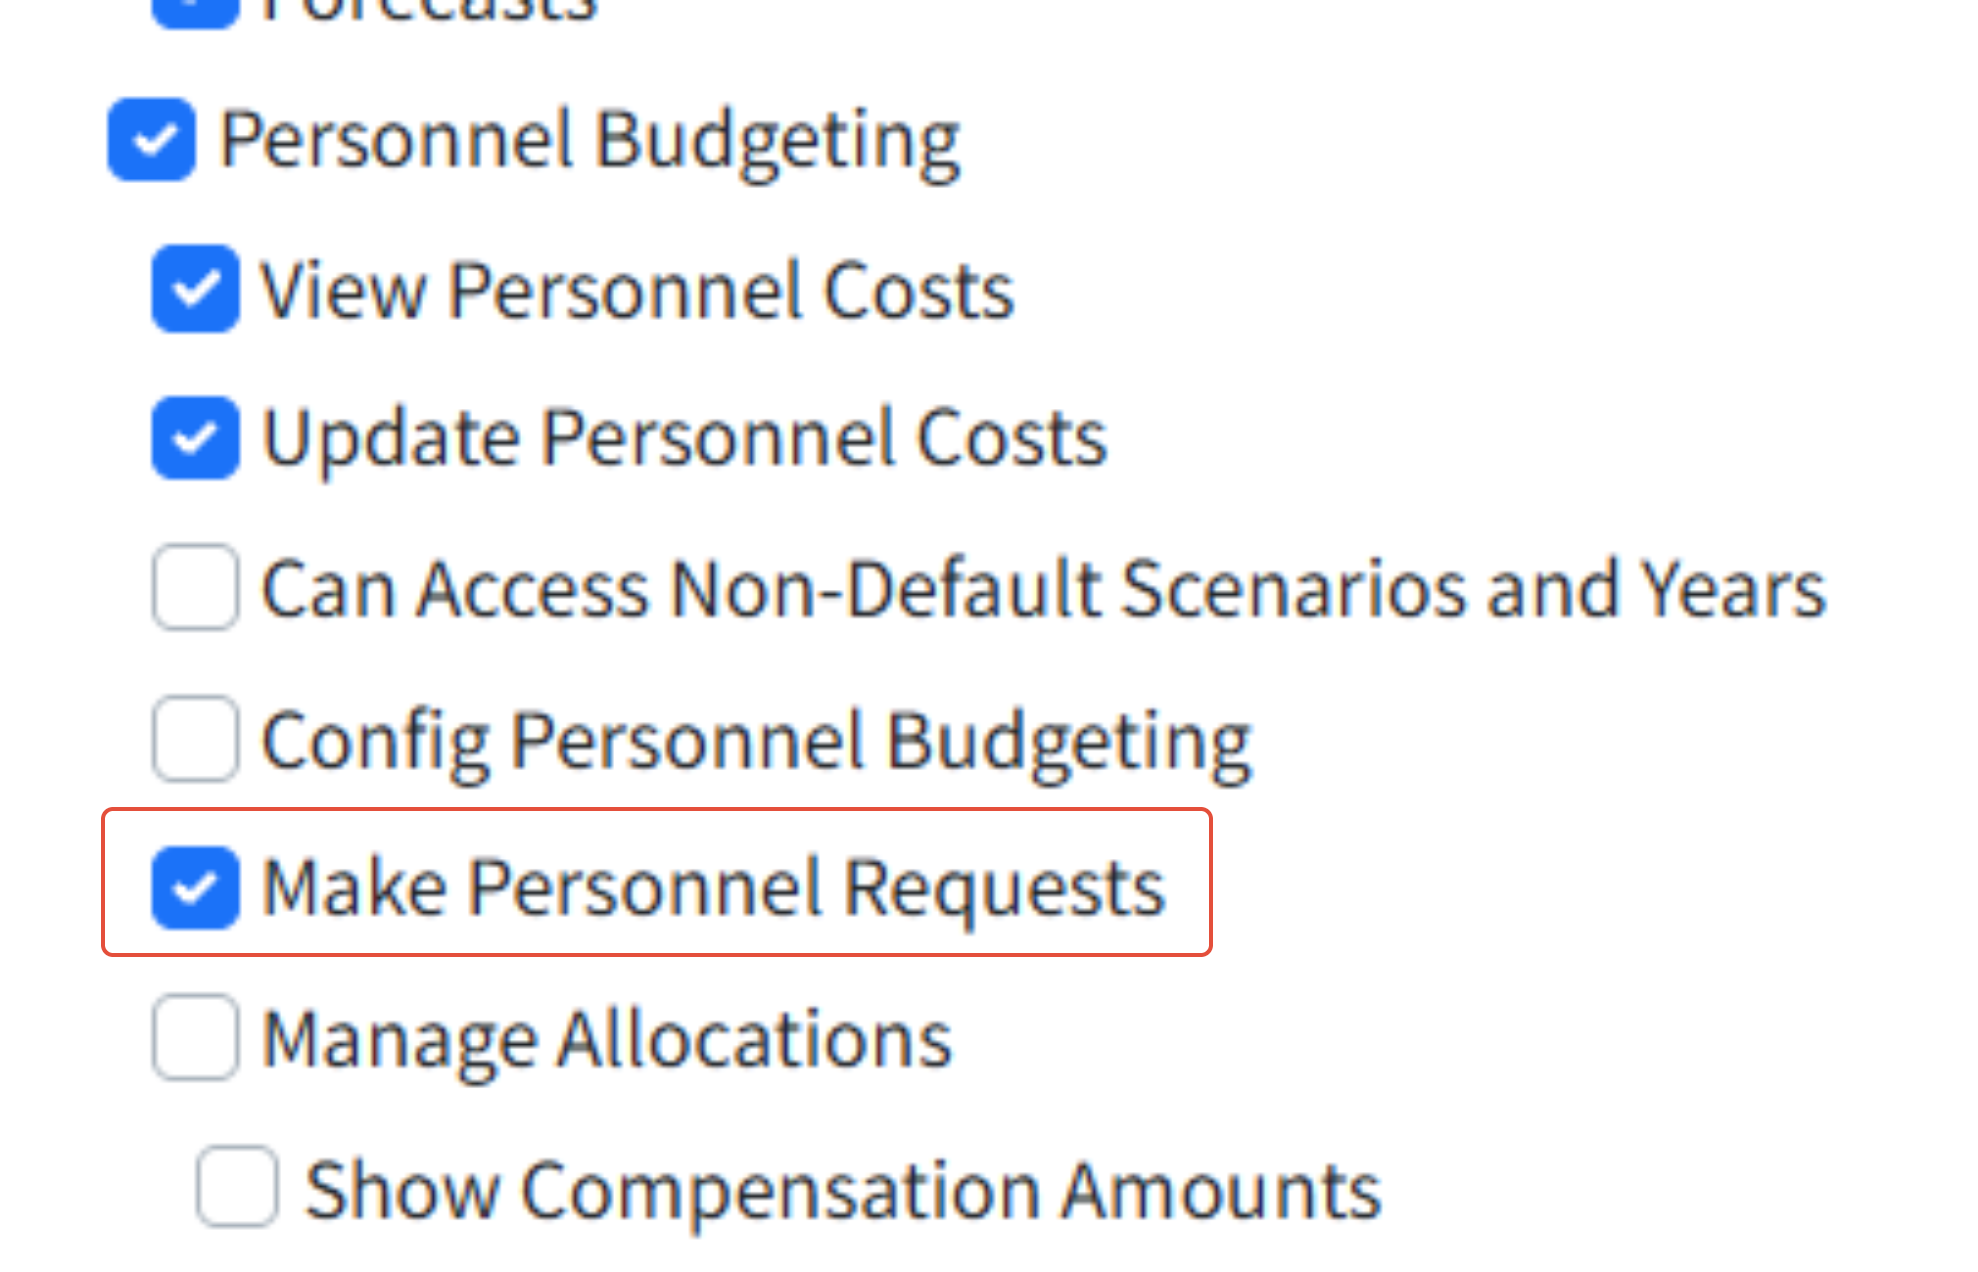
- Go to Setup > Users > Permissions and select Make Personnel Requests.
- Click Save.
Creating Personnel Requests
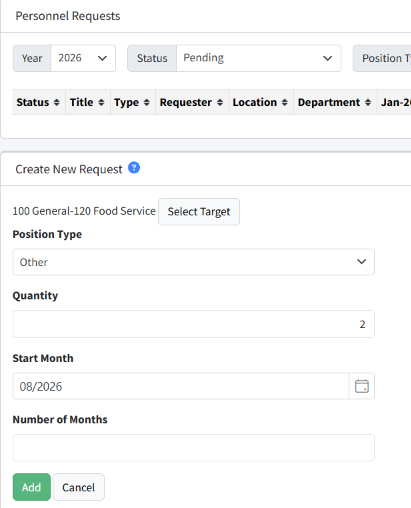
- Go to Personnel Budgeting > Personnel Requests.
- Click Select Target.
- Choose the appropriate worksheet and click Select.
- Select the Position Type from the dropdown.
- Enter the Quantity of positions you would like to request.
- Select the Start Month.
- Enter the Number of Months for temporary or seasonal positions. Leave this blank for a full-year ongoing position.
- Click Add.
Managing the Personnel Requests
Reviewing the List of Personnel Requests
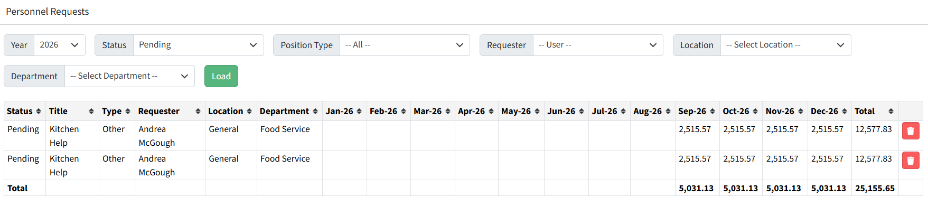
As positions are requested, they’ll be listed at the top of the Personnel Requests page. Use the filters at the top of this list to view pending, approved, rejected, or all requests. Personnel requests are visible only to the requester, Admin users, and the user designated as the Personnel Request Approver.
Approving and Rejecting Personnel Requests
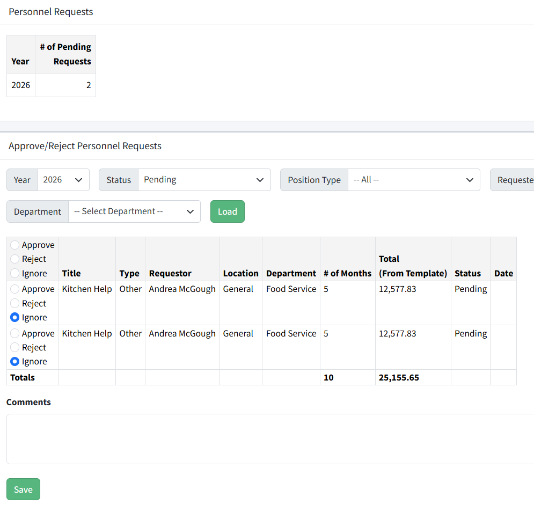
The personnel request approver can approve or reject personnel requests. Select to approve, reject, or ignore the pending requests. Add comments as necessary, then click Save. An email will be sent to the requester to inform them of any approvals or rejections. The comments will be included in the email. Any requests that are set to be ignored will remain pending for later review. Whenever a request is approved, that position will be added to the default personnel budgeting scenario.
Reviewing Approved Personnel Requests
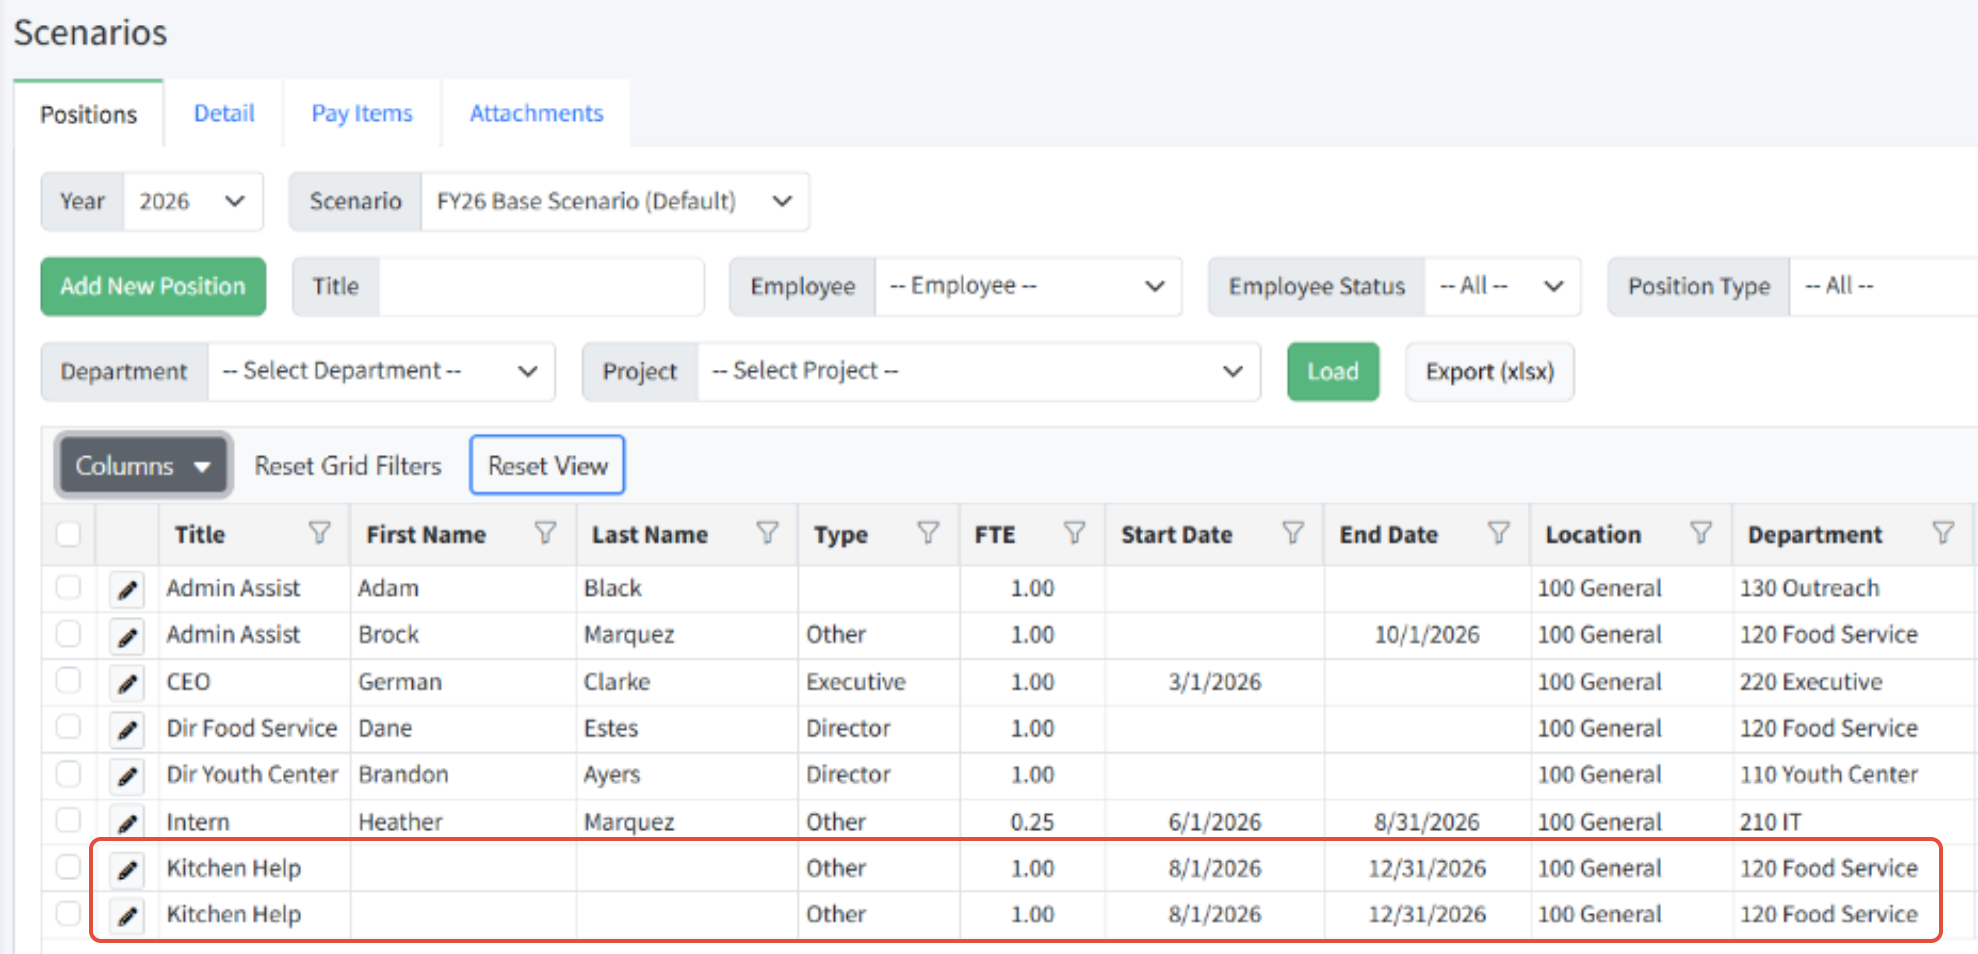
Approved personnel requests are added to the default personnel budgeting scenario.
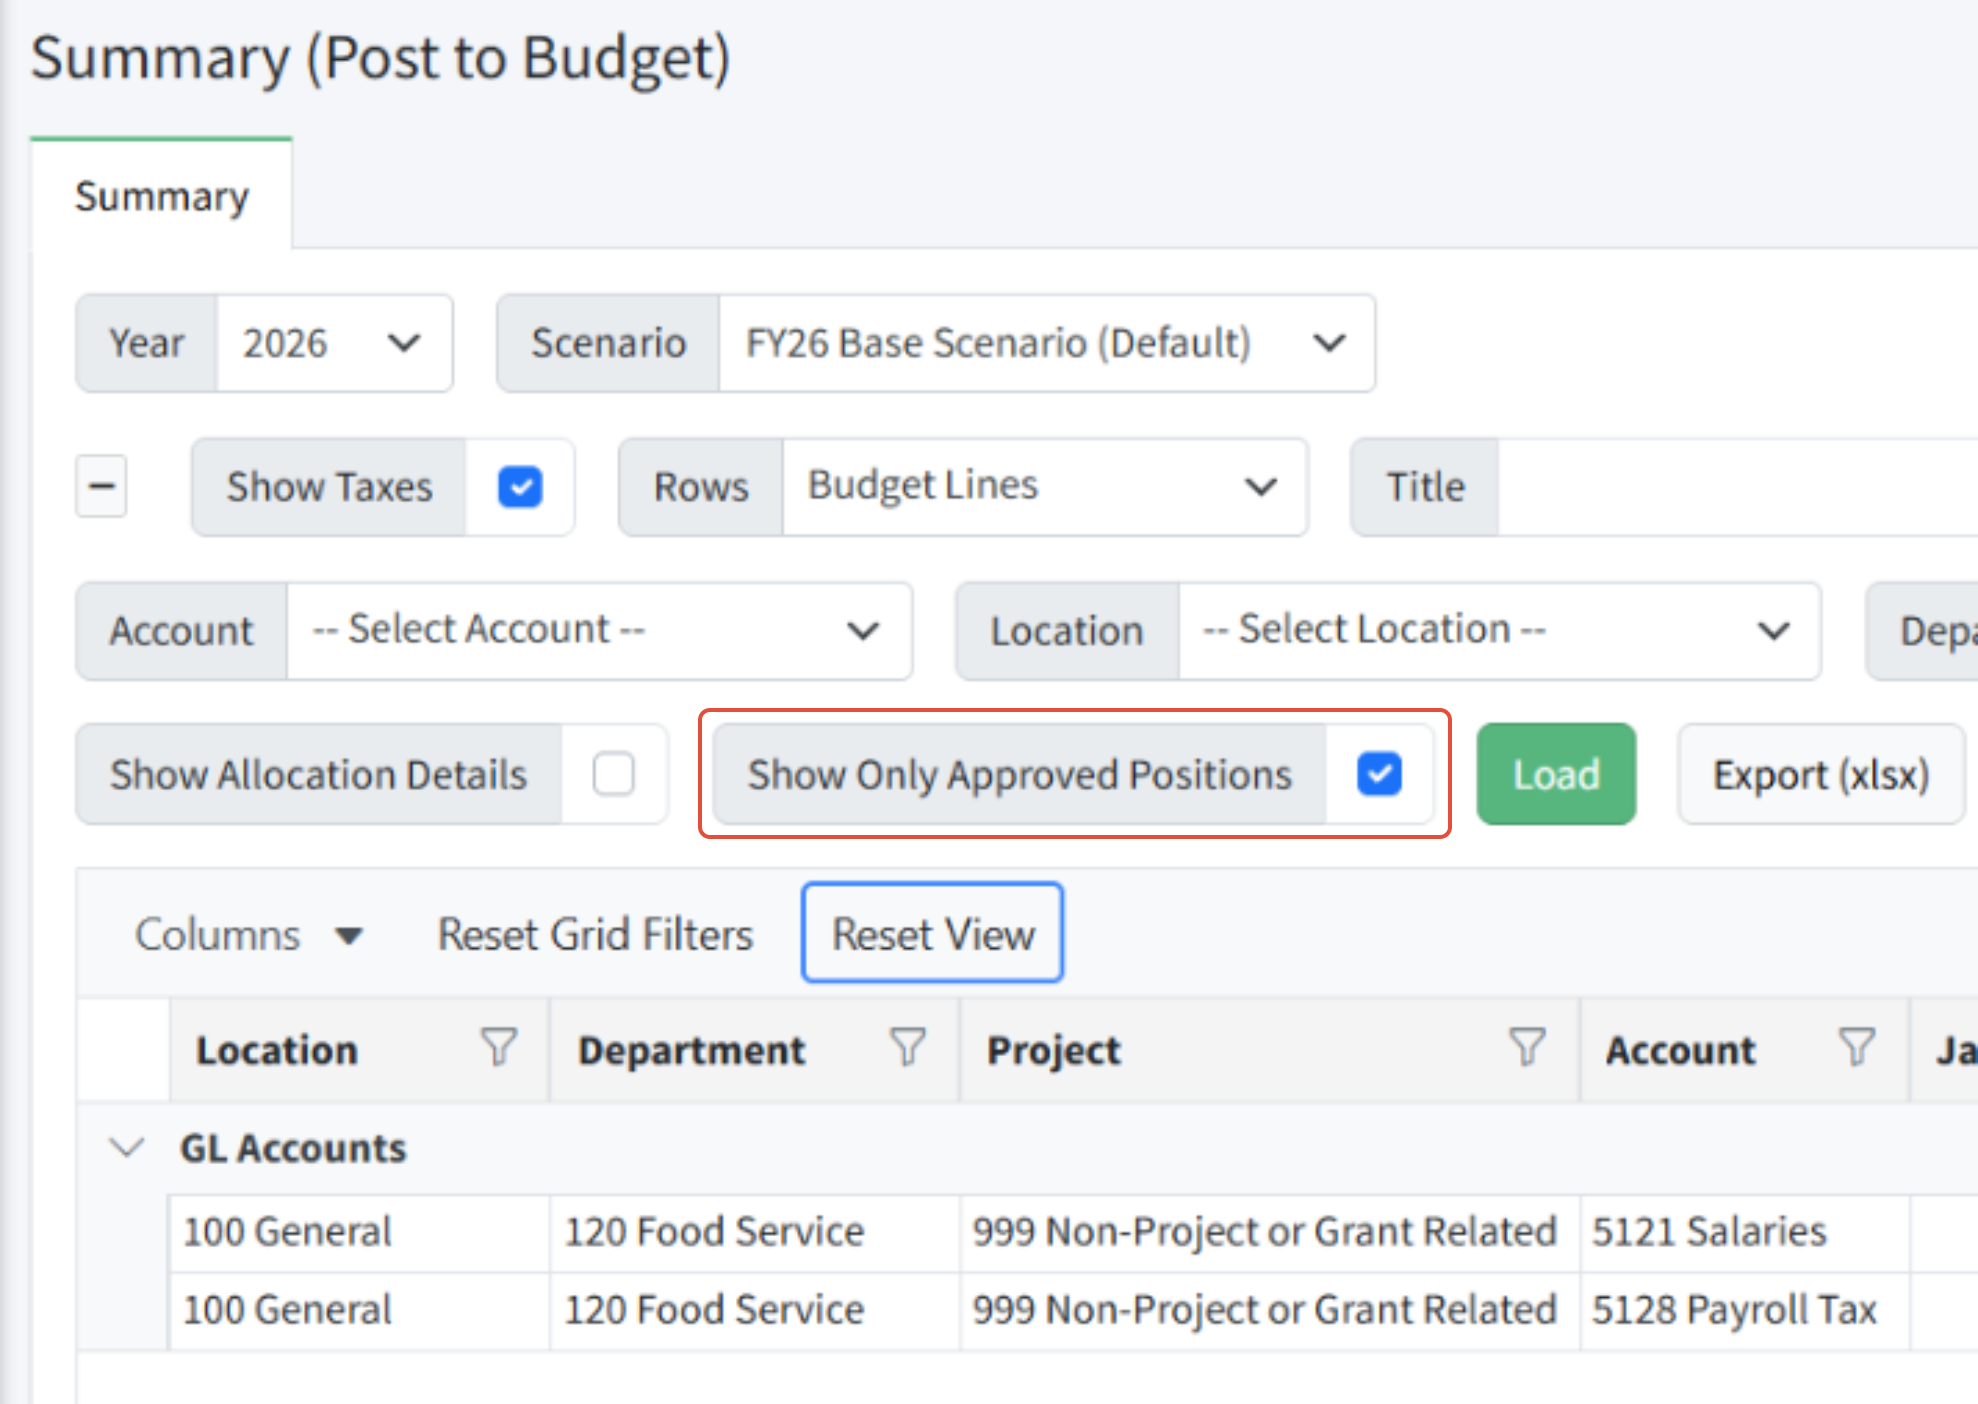
The Summary (Post to Budget) report has a special filter to limit the display to approved personnel requests.
Was this article helpful?
That’s Great!
Thank you for your feedback
Sorry! We couldn't be helpful
Thank you for your feedback
Feedback sent
We appreciate your effort and will try to fix the article