The Planner Allocations feature provides for a different type of budget, called a pre-allocation budget. Each worksheet in a pre-allocation budget can be allocated on a percentage basis to any worksheet(s) in the default Planner budget.
Planner Allocations is an optional feature of Martus, available with the Standard Plus, Plus, and Premium level subscriptions. This feature must be enabled by support. If you would like to utilize this feature, create a ticket through the Knowledge Base if you are a direct Martus customer, or contact your Martus reseller if you are supported through one of our Martus partners.
Important Facts about Pre-Allocation Budgets
- The pre-allocation budget should include worksheets only for those dimensions that need to be allocated.
- Pre-allocation budget will allow you to designate a singular percentage allocation that will be applied across that worksheet.
- The allocation percentage must total 100%.
- Each worksheet within a pre-allocation budget should only budget to those accounts that need to be allocated. Do not add accounts that are allocated elsewhere such as in Personnel Budgeting.
- Each pre-allocation budget can be managed within Martus with the same tools used for Planner budgets. This includes reporting, setting the default pre-allocation budget, and other standard functions such as copying, importing and exporting, using SPWs, and the approval process.
- The pre-allocation budget, when allocated to the default Planner budget, will replace all values associated with the lines in the pre-allocation budget.
- Allocated amounts can be edited in the worksheet, and there is no visual indication that the allocated amounts came from a pre-allocation budget. It is recommended to add notes to the pre-allocation worksheets, as these will post to the allocated amounts in the planner budget.
Creating a Pre-Allocation Budget
- Go to Planner > Planner Setup > Budget Management tab.
- Select the appropriate year if needed.
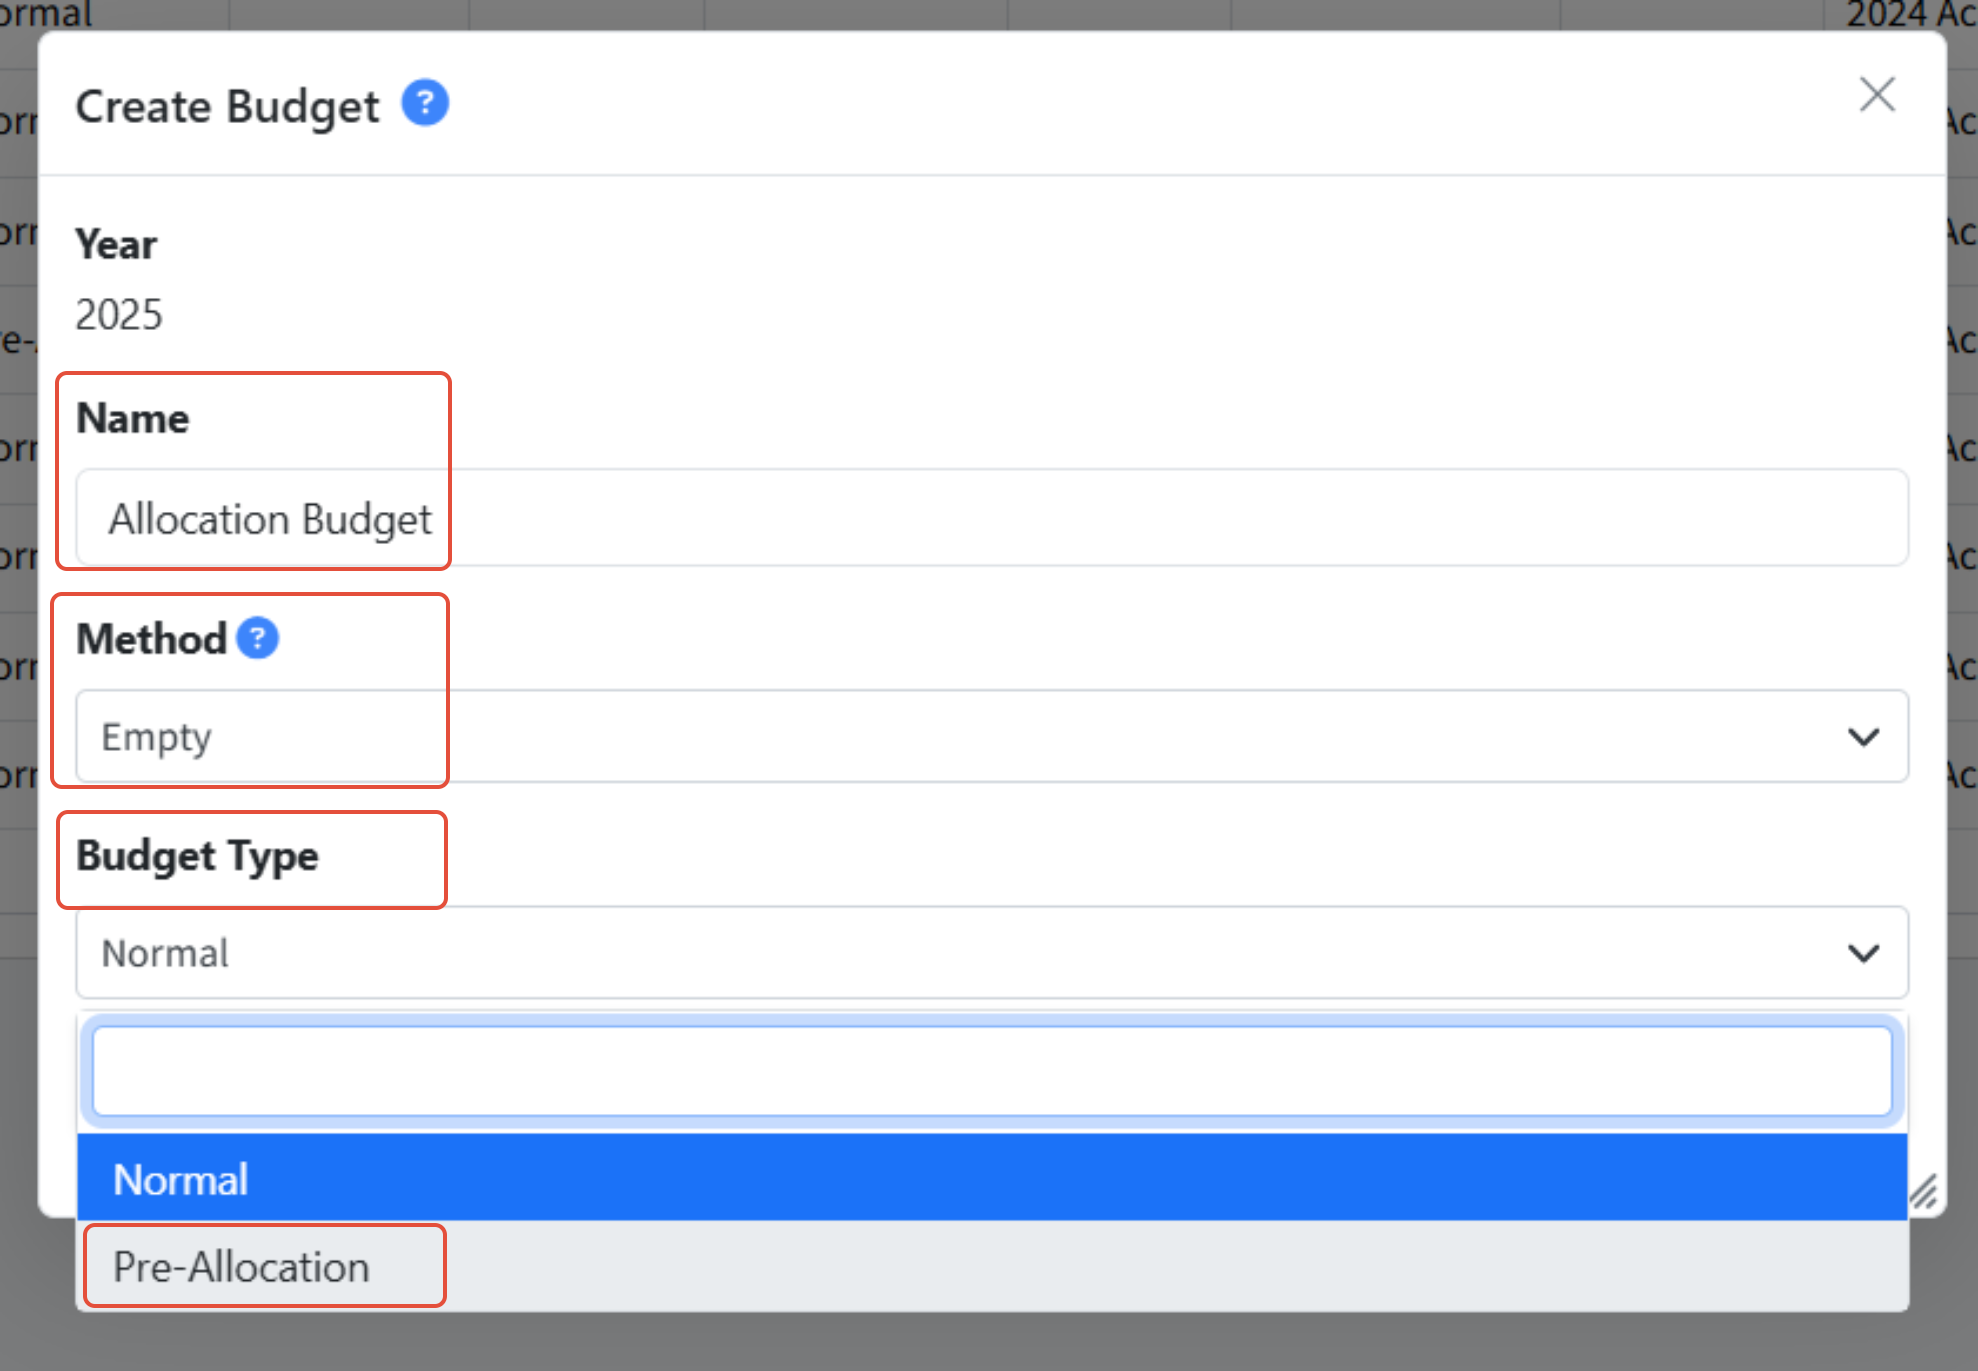
- Click Create Budget.
- Give the budget a Name.
- Choose Empty from the Method dropdown.
- Choose Pre-Allocation from the Budget Type dropdown.
- Click Create Budget.
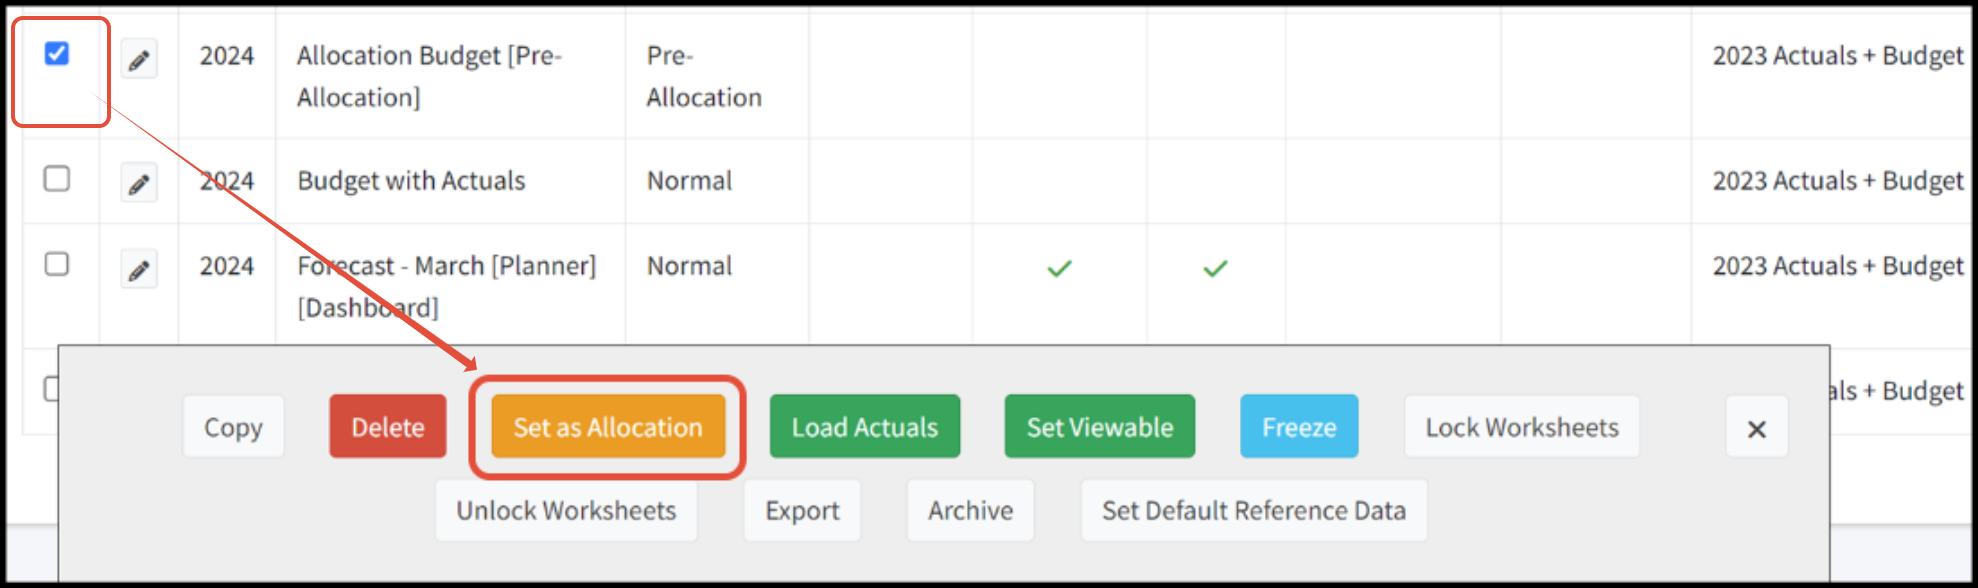
- Select the budget that was just created using the box to the left.
- Click Set as Allocation.
Adding Worksheets to a Pre-Allocation Budget
- Go to Planner > Planner Setup > Worksheet Management tab.
- Change the budget drop down to the pre-allocation budget.
- Click Load to view the pre-allocation budget.
- Click Add Worksheet.
- Fill out the fields as appropriate.
- Most Planner Allocation worksheets have one dimension that is left blank so that roll up amounts across that dimension can be utilized in the budget worksheet
 Note: Most Planner Allocation worksheets have one dimension that is blank so that roll-up amounts across that dimension can be utilized in the budget worksheet.
 - Click Add Worksheet.
Adding Lines and Values to a Worksheet One by One
- Go to Planner > Worksheets.
- Click Edit (pencil icon) for the appropriate worksheet.
- Click Line Actions > Add Line.
- Select the appropriate Account and any line dimensions desired.
- Click Add Line.
- Add additional lines as needed. Note: Remember only lines that need to be allocated should be added.
- If needed, click Show Reference Data or use > (carrot) on the row. As an example, all reference data for the Department below is showing regardless of what Corporation it is tied to as Martus will automatically select the "Top Level" option for the empty dimension.

- Update the line with the appropriate budget numbers.
Adding Lines and Values to a Worksheet Via Load
This will load all existing lines within the reference data to the worksheet.
- Go to Planner > Worksheets.
- Click Edit (pencil icon) for the appropriate worksheet.
- Ensure the appropriate reference data is set and click the Show Reference Data checkbox
- Review the lines that will be loaded
- Click Worksheet Actions > Load.
- Add or remove lines as needed.
Note: Remember that only lines that need to be allocated should be added.
Allocating the Worksheet
- From Planner > Worksheets, select a worksheet to edit.
- Click Worksheet Actions > Allocate worksheet.

- Click Add New Target and select the appropriate worksheet to allocate.

- Enter the percentage to allocate to the target worksheet and click + to save.
- Continue adding targets worksheets as needed.
- When finished, click Post to Planner Budget to post the allocated amounts to the matching lines in the default Planner budget.
Was this article helpful?
That’s Great!
Thank you for your feedback
Sorry! We couldn't be helpful
Thank you for your feedback
Feedback sent
We appreciate your effort and will try to fix the article