Types of SPWs
There are four types of SPWs, each with specific uses.
- A Worksheet Special Purpose Worksheet (WSPW) is created from the Worksheet Actions menu on the worksheet, and is specific to a single worksheet in a budget. Detail for lines in that worksheet are captured in the WSPW.
- A Global Special Purpose Worksheet (GSPW) is created in Planner > Special Purpose Worksheets. GSPWs are used to affect multiple lines across multiple worksheets in a budget by using calculations and values to allocate non-editable amounts.
- A Template Special Purpose Worksheet (TSPW) is created in Planner > Special Purpose Worksheets. TSPWs are used to provide a template for import into an individual WSPW, with editable and non-editable lines.
- A Multi-Year Special Purpose Worksheet (MSPW) is created in Planner > Grant Budgeting. MSPWs are used for budgeting in multiple years, and can affect multiple lines across multiple budgets.
All SPWs can be accessed from Planner > Special Purpose Worksheets, except the MSPW, which is accessed from Planner > Grant Budgeting.
Click here to Watch How To Build an SPW.
Creating a Worksheet-Specific SPW (WSPW)
- Navigate to Planner > Worksheets.
- Click the Edit pencil to the left of the Worksheet for which you want to create the WSPW.
- Click Worksheet Actions.
- Click Create Special Purpose Worksheet from the dropdown.
Note: If a WSPW already exists for the budget worksheet, click Edit Special Purpose Worksheet from the Worksheet Actions menu.

Creating a Global SPW or Template SPW
- Go to Planner >Special Purpose Worksheets
- Click Add New Global SPW or Add New Template SPW as appropriate

To edit an existing GSPW or TSPW, click on Edit to the right of the name.

Creating a Multi-Year SPW
- Go to Planner > Grant Budgeting.
- Click Create MSPW or Edit MSPW. Click here for more information on MSPWs.

Anatomy of a SPW Page
An SPW is made up of multiple lines, typically organized into sections, like the example below. Those lines may contain values or calculations using formulas, and some may post to a defined worksheet line. When unfiltered, formula lines show the other lines used in the formula below the amounts. Posting rows show the account and dimensions, and any lines used in formulas, below the amounts.
The Summary section contains the rows that will post, with the location and amounts to be posted. Multiple posting rows may post to the same Summary line.
Before you create an SPW, you should consider how you want it to be organized. The best-practice recommendation is to structure each SPW with the sections that make it easy to follow a logical process from the models to the totals.

Building a SPW
Every SPW line contains related information: Info and Values.
- The Info tab is used to maintain the general information for that particular line: the Section it belongs to, the Description or name, and posting information if desired. Sections and Descriptions are listed in alphanumeric order; use a numbering system to control the sequence of lines.
- The Values tab is used to manage the values and maintain Notes for each month. On the Values tab, use the Budget Widget or a formula, based on calculations using other lines.
To begin to build your SPW, follow these steps:
- Click Add Line to create a new line.
- On the Info tab, choose an existing Section name from the dropdown, or define your own by typing in the Section field.
- Enter a Description for this line of the section. The Description must be unique and has a max length of 100 characters.
- If this line will be the line that is posted, check Post to Budget Worksheet and specify the Worksheet, Account and any other applicable dimensions. Uncheck Post to Budget Worksheet to stop posting to that worksheet and account.

- On the Values tab, enter the values for the line using the Budget Widget, or use a Formula to make calculations.

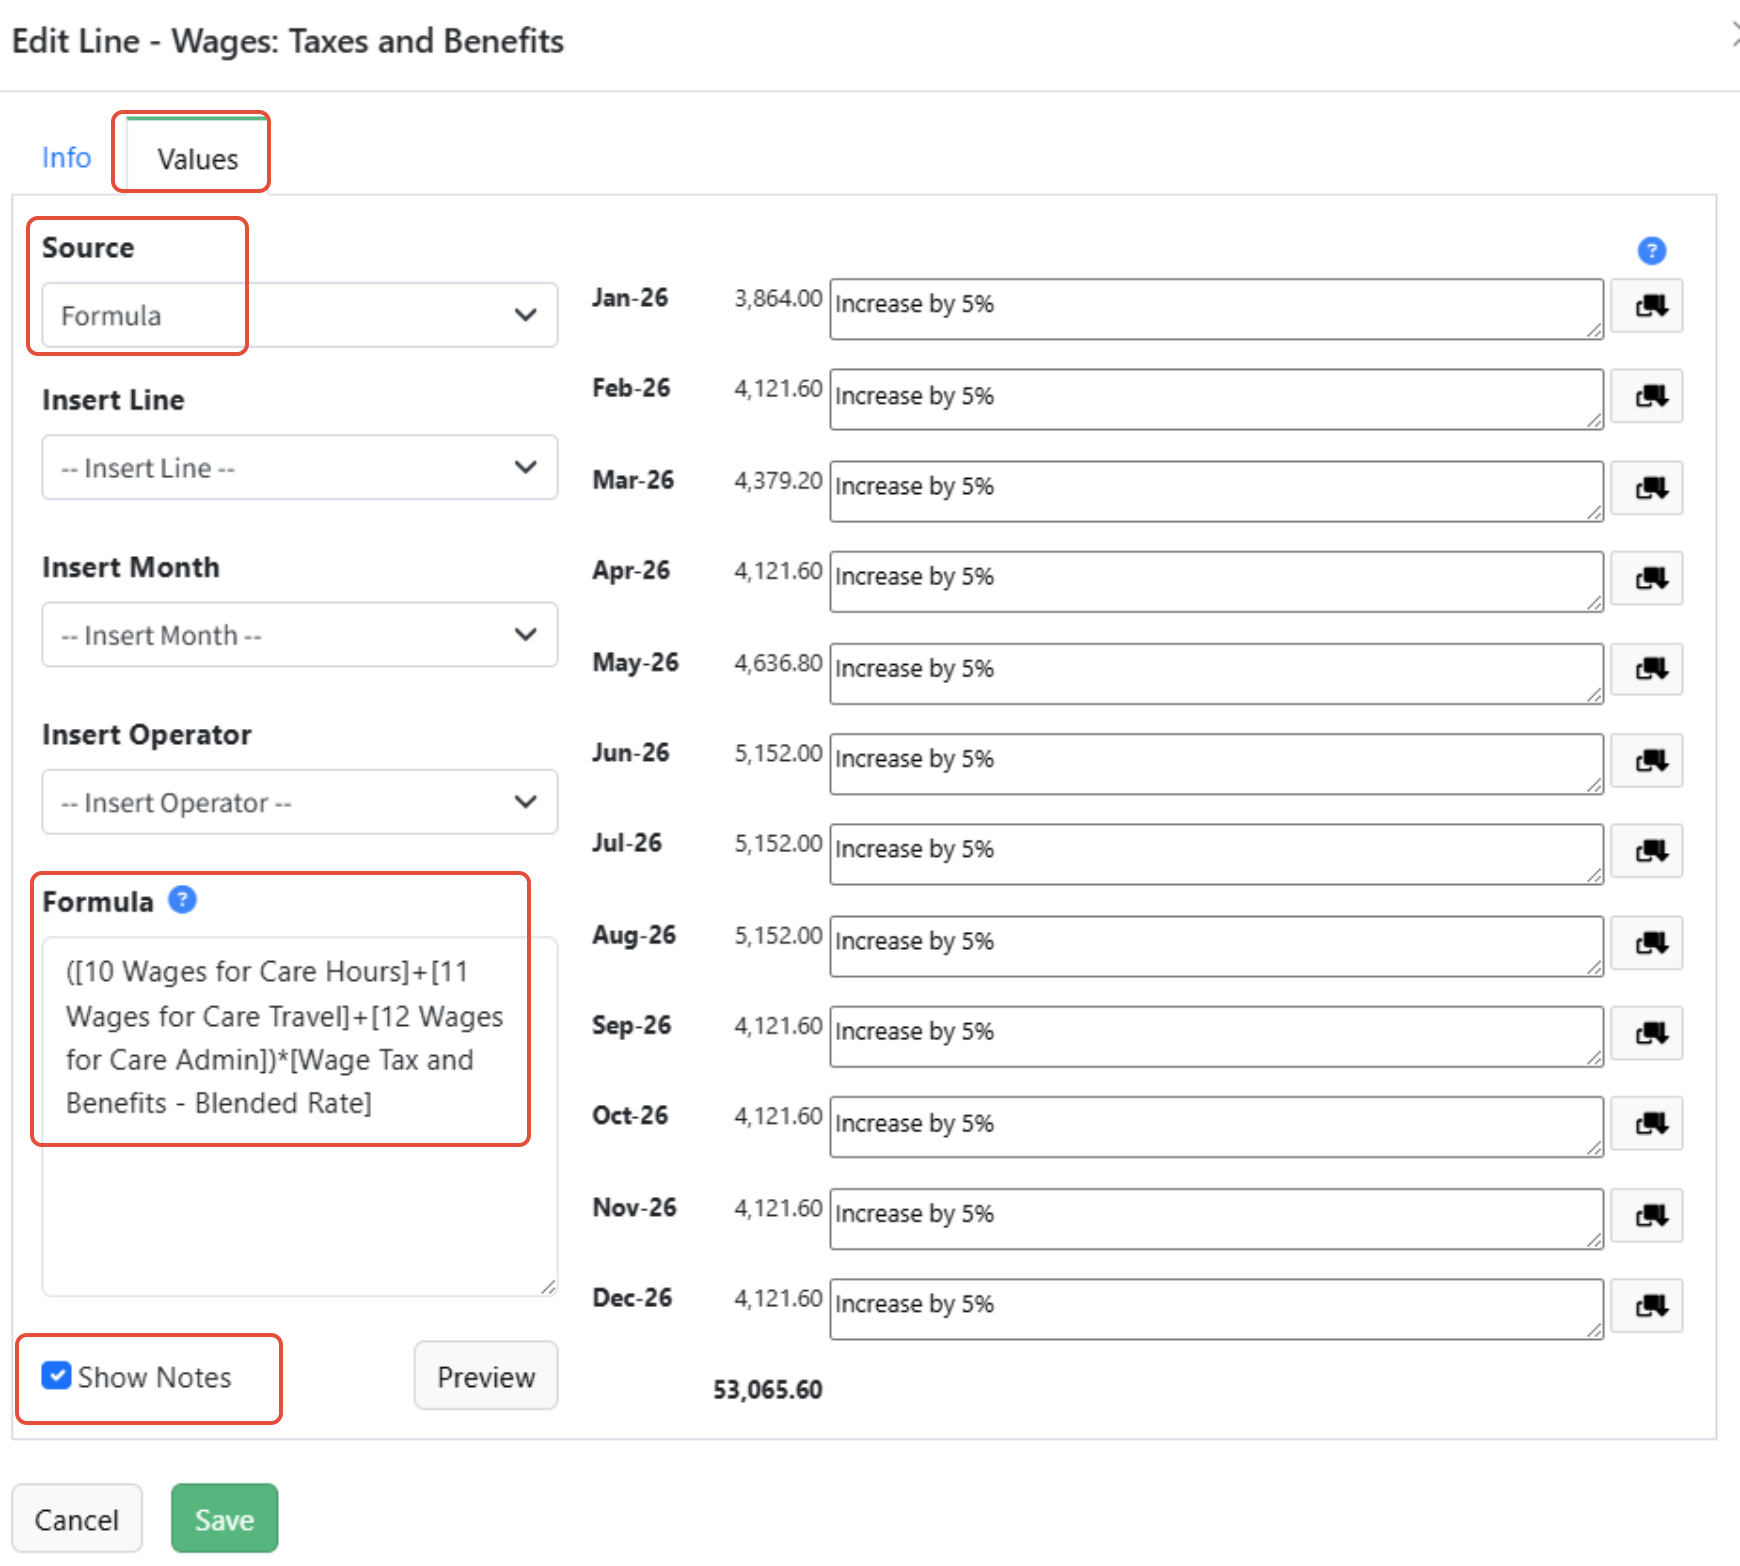
- Click Show Notes to enter any Notes desired.
- Click Preview to preview the amounts.
- Click Save to save your changes.
Click the red trash icon to the right of a line to delete the line from the SPW.
Continue to add as many sections and lines as needed, building the detail of the SPW.
- Click Add Line to start a new section or add lines.
- Click the + to the right of the section title to add lines to the section.
- Click Copy to the left of the Calculator Widget to add similar lines to that section. The description must be unique, and values must be entered for the new line.
For additional information about navigating an SPW, including other shortcuts, review Navigating the Special Purpose Worksheet.

When ready, click Post to Worksheet(s). The lines in the Summary will be posted to the worksheet(s).
Special Purpose Worksheet Actions
You have the following options:

- Cancel - Cancels any changes made since the last time the SPW was saved.
- Worksheet - Shown on WSPWs only, this button returns directly to the associated worksheet.
- Post to Worksheet - All budget numbers and notes in the Summary section are posted to the appropriate budget worksheets.
- Load Prior Year SPW - Load the SPW for this worksheet from the prior year's default Dashboard budget.
- Post to WSPWs and Worksheets - Post the updated SPWT to any WSPWs into which it has been imported, then post those WSPWs to their respective worksheets.
- Delete - Deletes the entire SPW. Any amounts and notes already posted to a budget worksheet are retained in that worksheet and can be edited directly through the worksheet. If an SPWT is deleted, imported lines remain, but they are no longer connected to the SPWT.
- Export Printable Version to Excel – Creates an Excel file with all the details of the SPW, including notes. This option is a printable version, to obtain a re-importable version, please export the budget from Planner > Planner Setup.
Notes about SPWs
Making mass edits to SPWs
- To make updates to SPWs via export and import, Go to Planner > Planner Setup and export the budget. Within the file, navigate to the SPW tab and make any changes. Then import the budget back into Martus into a new budget. Note: Certain changes such as making changes to formulas or formula rows are not best practice due to the high likelihood of error. For assistance with this process, please create a ticket through the Knowledge Base if you are a direct Martus customer, or contact your Martus reseller if you are supported through one of our Martus partners.
Interactions between SPWs and WSPWs
- If you have multiple SPWs and/or WSPWs that affect the same budget line, the contents of the budget line will be determined by the SPW that was most recently posted to the worksheet.
Posting to the same GLs and Dimensions within Different SPWs and WSPWs
- If you have different multiple Global SPWs that post down to the exact same GL line and dimensional combination Martus will not sum those lines. Only one line will be posted. The line that will be posted will be the last line going from top to bottom of your SPWs/WSPWs of that GL and dimensional combination.
Updates to Frozen Months
- When posted, GSPWs and WSPWs do not update frozen months.
Updates to Locked Worksheets
- SPWs cannot be posted to locked worksheets.
Copying Budgets
- When a budget is copied, all SPWs within it are also copied and posted if desired. SPWs are posted in this order: first any SPWTs are posted to WSPWs, then all WPSWs are posted, then any global SPWs are posted.
SPW Rounding
- SPW lines can hold up to 4 decimal places, but if the line posts to the budget worksheet, every monthly and yearly value will be rounded to 2 decimal places. Sometimes, the total on the SPW line up top will not match the total on the Summary line because of the rounding.
- The entire Summary line (rounded to two decimal places) will be what’s posted onto the worksheet. Rounding happens after calculations are done, so you get 4-decimal point precision through calculations (which can be significant when there are multiple lines of calculations and large numbers).
Unpost a GL from an SPW
- make sure the worksheet is unlocked
- Once you are in the SPW click the budget widget of the line you no longer want to post down to the budget
- check the box 'Post to Budget' and uncheck the box 'Post to Budget Worksheet'
- or delete the line entirely
- once changed make sure to scroll down to the bottom of the page and click 'post to worksheet' otherwise it will not unpost
Tempate SPWs
- Template SPWs are managed by Admins only.
- Any user who has access to a Worksheet Specific SPW (WSPW) can import any template into their WSPW.
- Any user who has access to a WSPW can remove template lines from the WSPW.
- Admins can adjust the Template and push adjustments into any WSPW that is currently utilizing that TSPW.
Was this article helpful?
That’s Great!
Thank you for your feedback
Sorry! We couldn't be helpful
Thank you for your feedback
Feedback sent
We appreciate your effort and will try to fix the article